My 2nd big house addition was a doozy. The primary things that the addition added were:
1) an expanded living room space (with a cathedral ceiling), that will allow a dining room where the living room used to be (a mini great-room of sorts),
2) a really nice Vermont Castings wood burning stove (with a brick hearth underneath it and brick wall behind it),
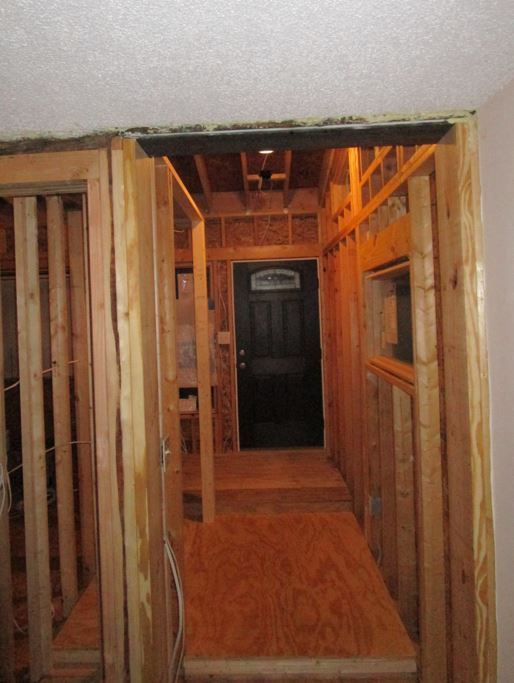
3) a boni fide entry way (with a front door that actually works finally - the old one never did!), and
4) a beautiful, old fashioned, covered front porch.
I got started filing for the building permit in early April, and actually started working on April 27 busting up the front steps with a jackhammer. (It took a few weeks for permit approvals.) I managed to get the exterior all buttoned up outside by mid-December. At this point I still have a lot of finish work to do inside, which will happen more slowly in 2024.
The two things that I hired out this time was the excavation for the foundation (I did that part last time) and the shingles on the primary roof. (I did all of the singles myself last time, and I did do the small connecting roof myself this time.) But unlike last time, I also had friends help out a few times, and I even hired the son of a friend to help for a few days with the heavy framing work. But most of it by far was done myself, one brick and one board at a time.
The framing for the cathedral ceiling and the large metal (L) beam I had to install where the exterior load bearing wall came down) was really tricky, as was keeping things dry for a few weeks before the roof could go on while the wall came down and beam went in, but tarps and a lot of hard work did the trick.
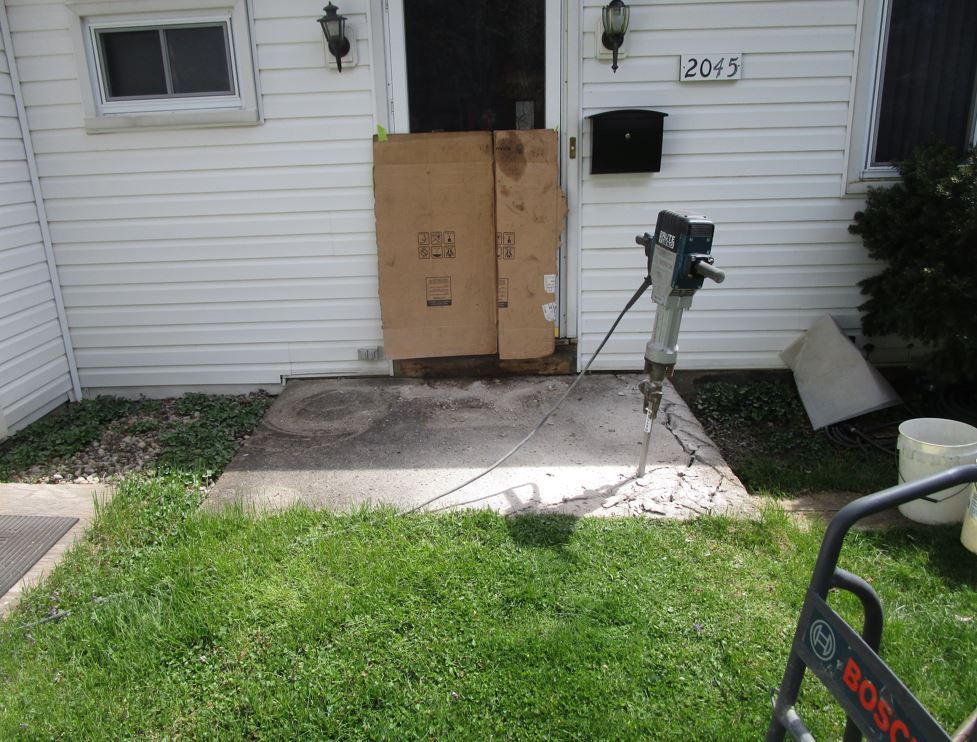
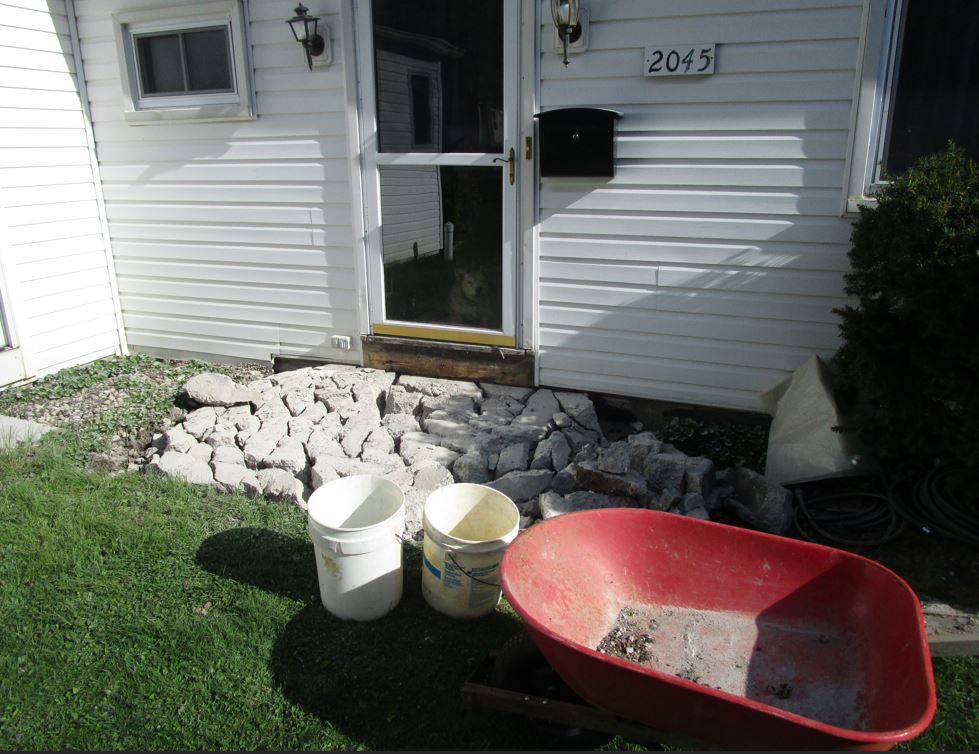
Taking out the old step and landing. Doing that kinda threw the ball over the fence and let my neighbors know something was going on. (April 27)
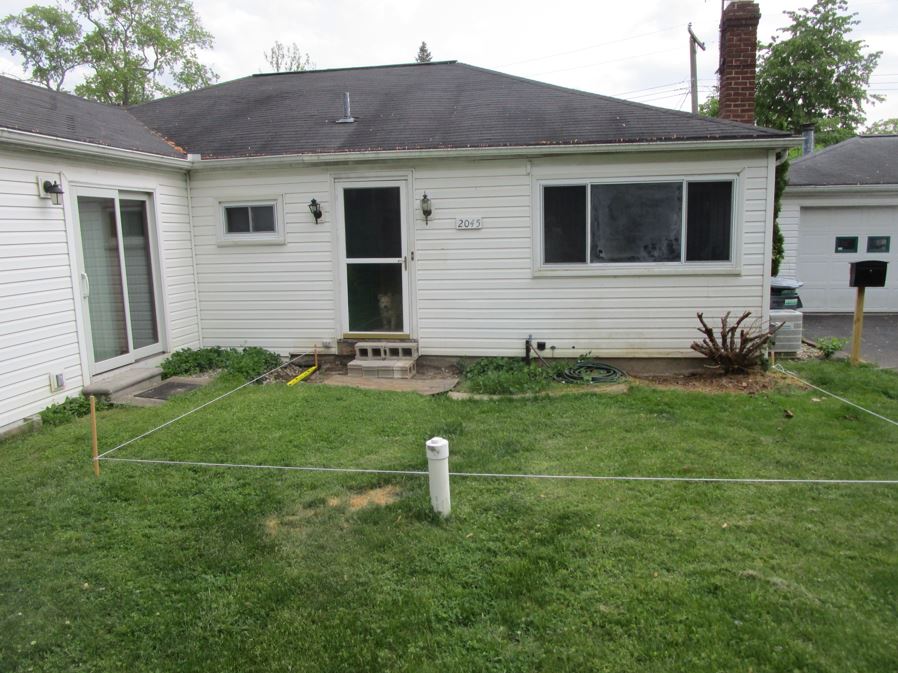
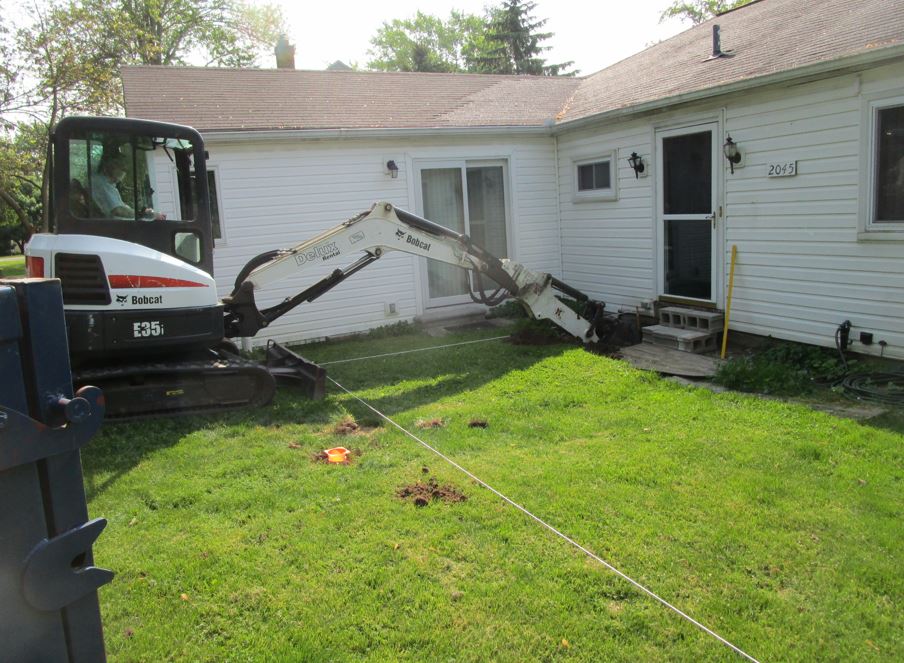
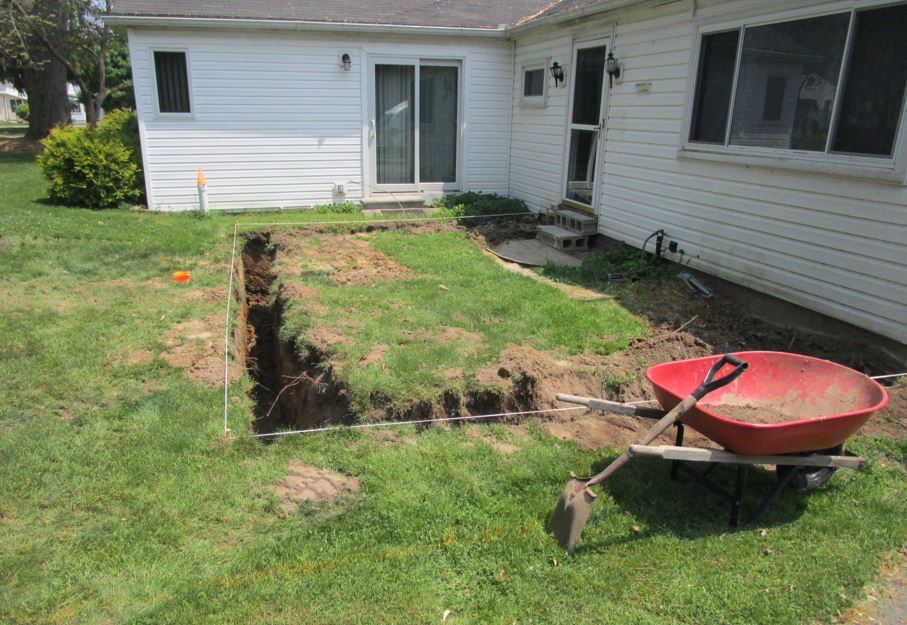
All staked out for the excavator. (I hired the same guy I worked with on the bedroom 8 years ago. He did good work for a grand.) (May 24)
Foundation dug, rebar installed, and foundation poured. (As I later discovered, pouring footings is a whole lot easier than a slab.) (May 30)
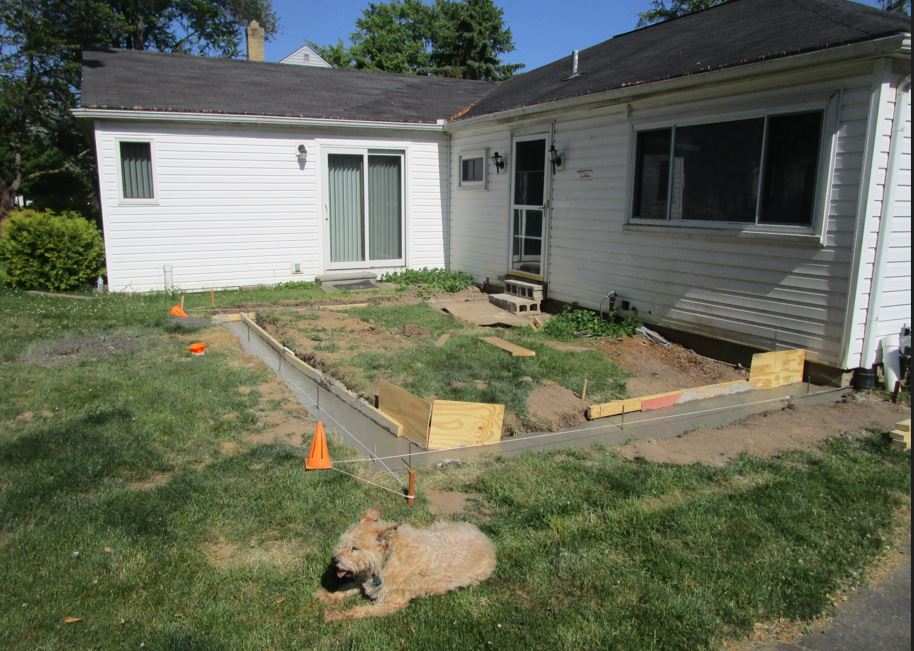
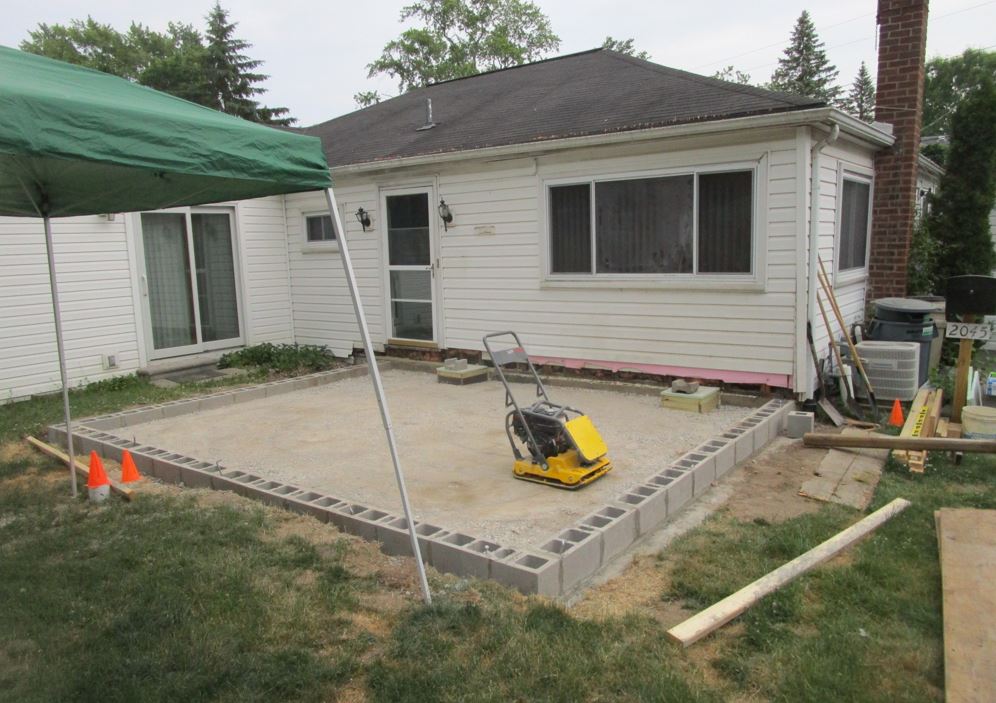
Finishing up the footings and getting ready for the slab. I had planned to put in a crawl, but I discovered that the foundation on the existing house was only 24" deep, so I was forced to use a slab. That also meant I had to do all of the plumbing and ductwork, and lay down some wire runs up front before I started on the frame. Helper Don (and Heidi!))
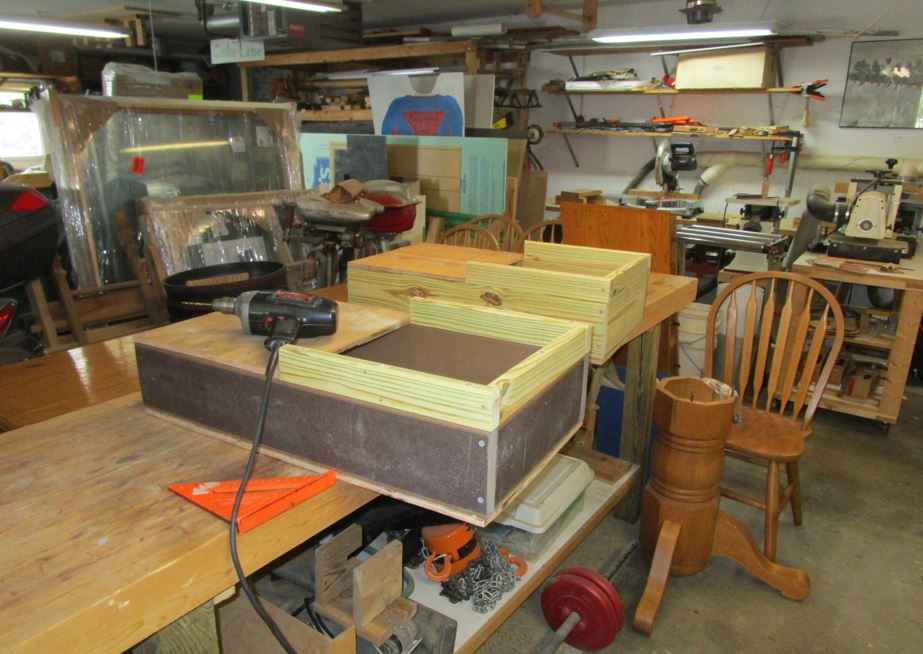
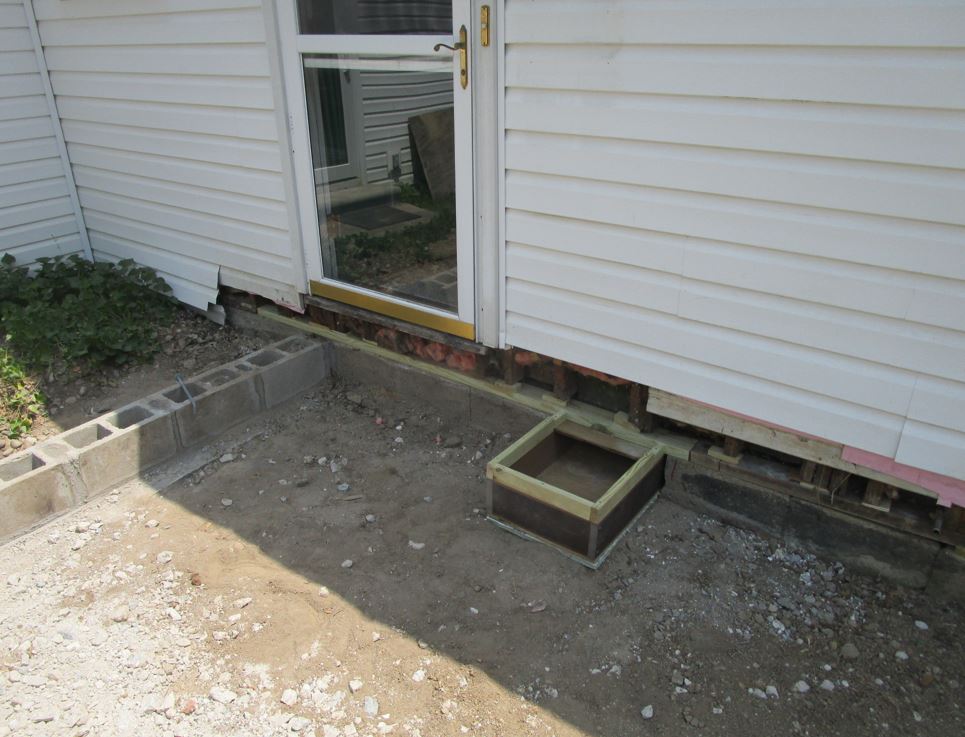
These are the boxes that run thru the existing foundation and up thru the (pending) slab. I had to install the boxes before the slab was poured.
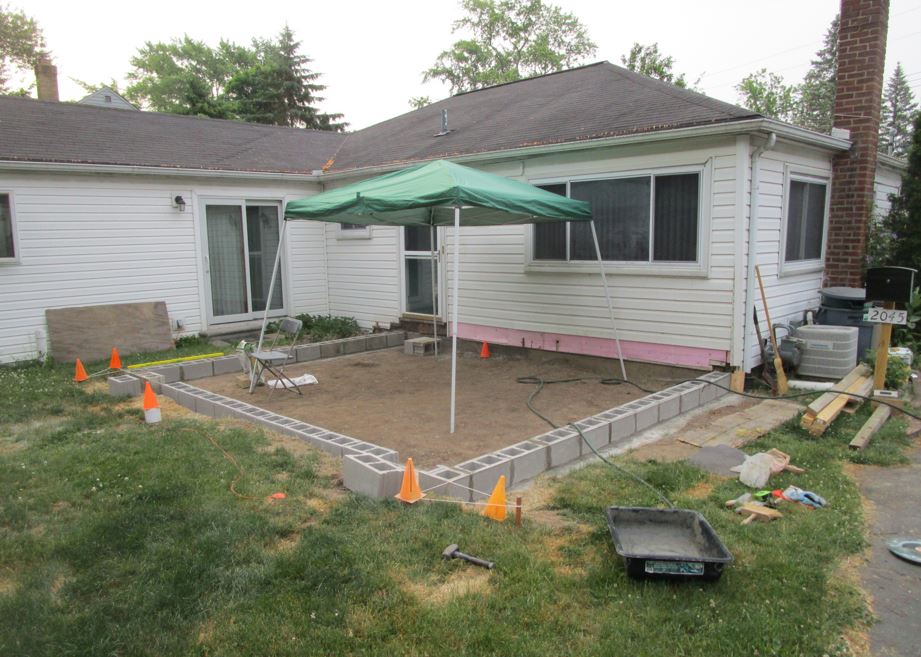
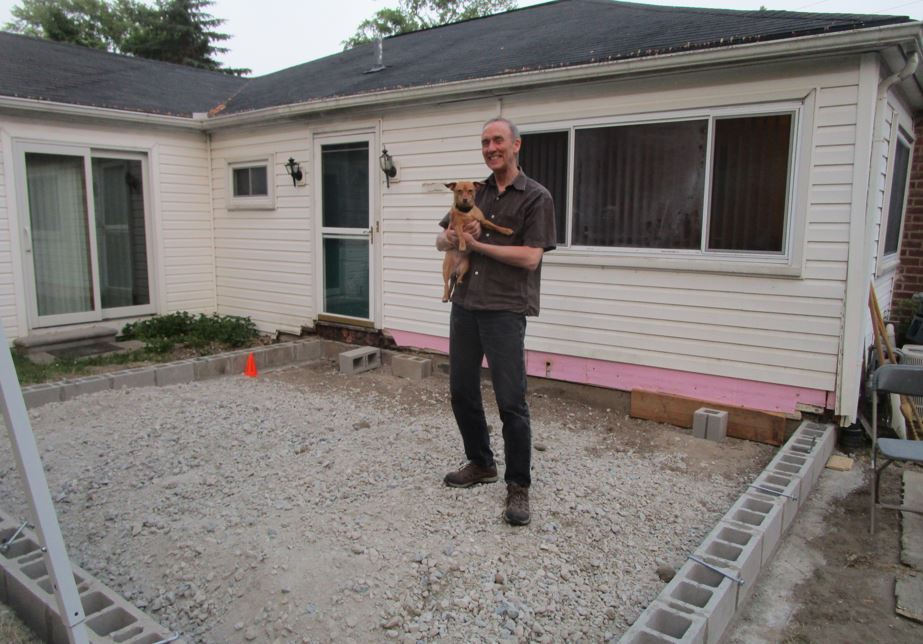
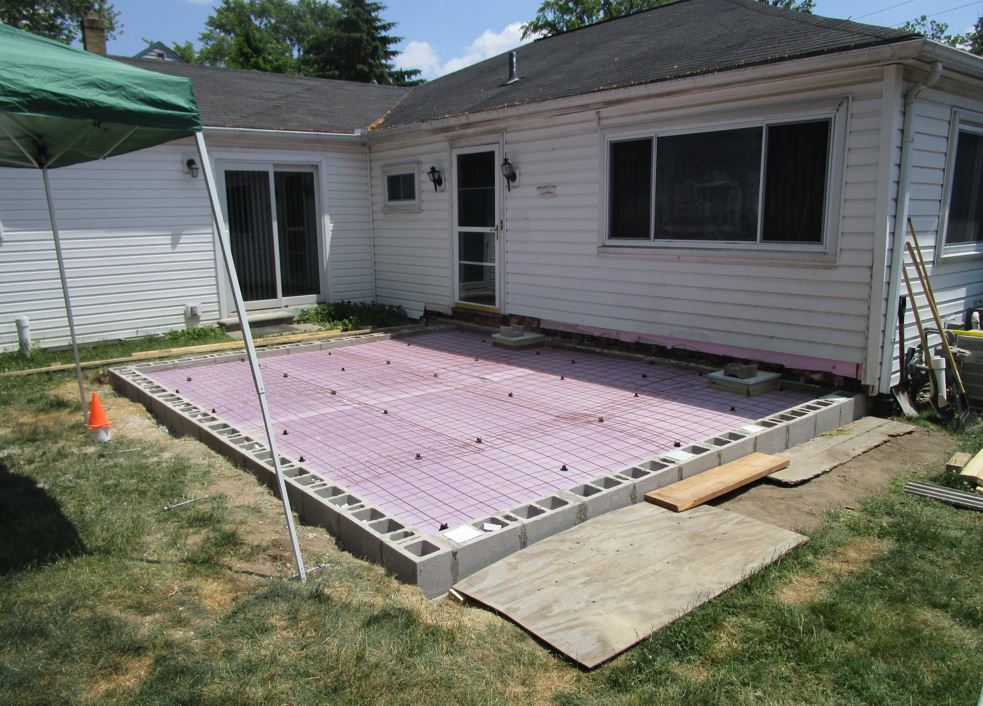
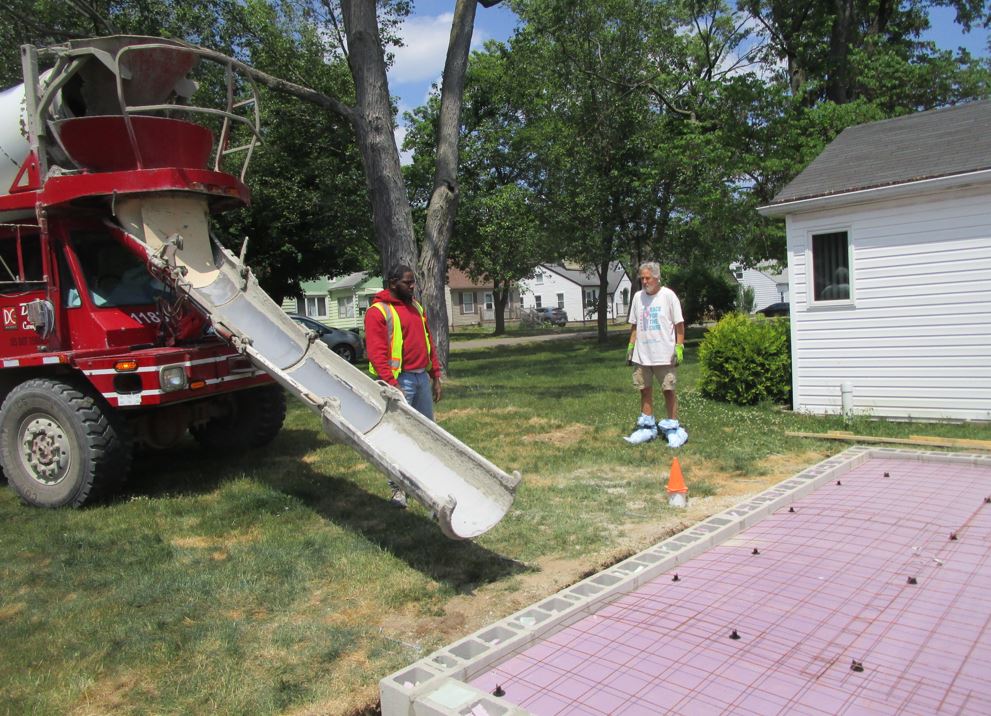
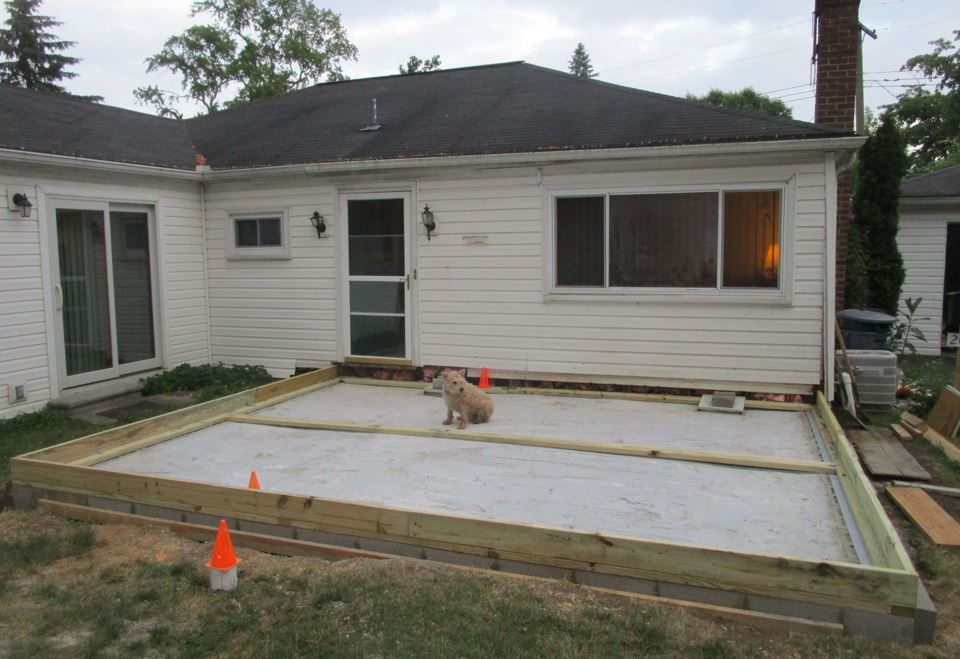
Compacted the gravel, added styrofoam and rebar, and all ready to pour.
When the truck shows up with the load, you gotta be ready! (Gotta like the bag-foot look.) (June 9)
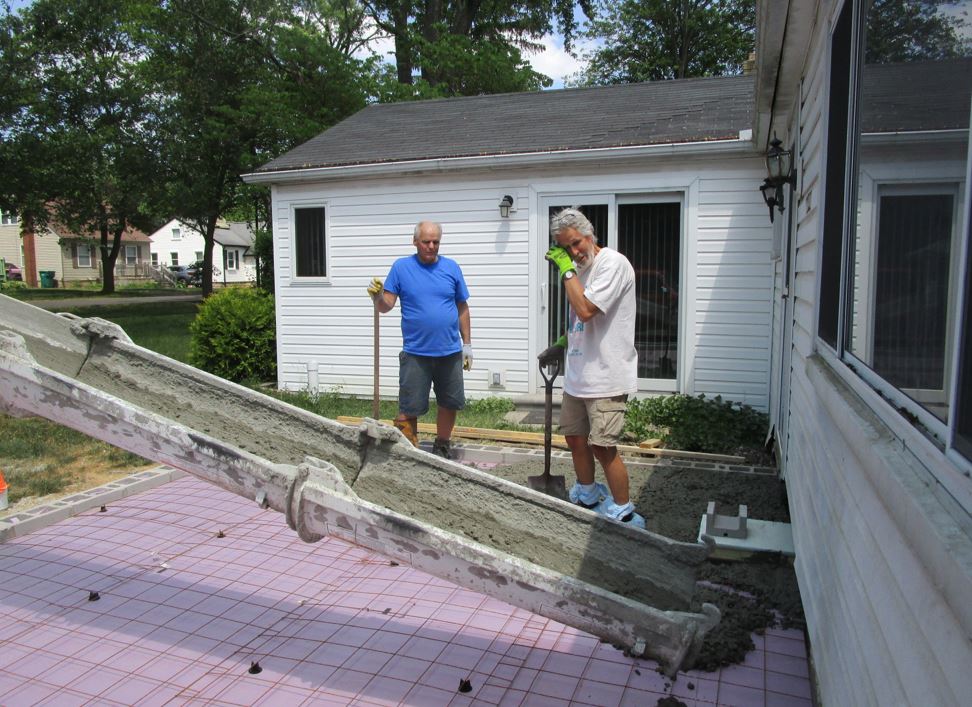
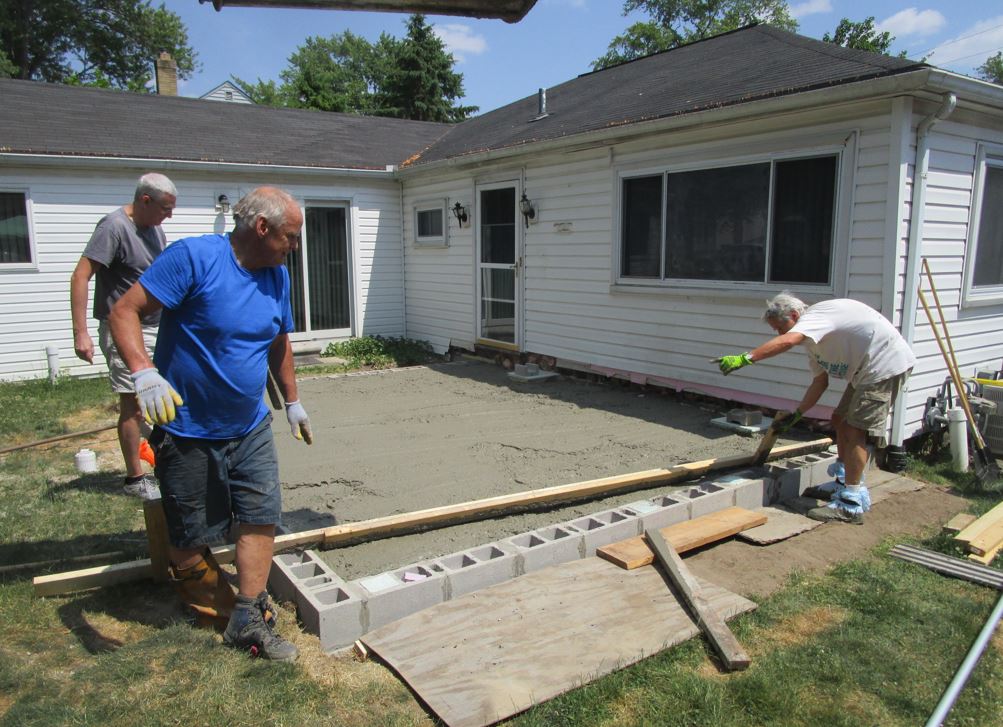
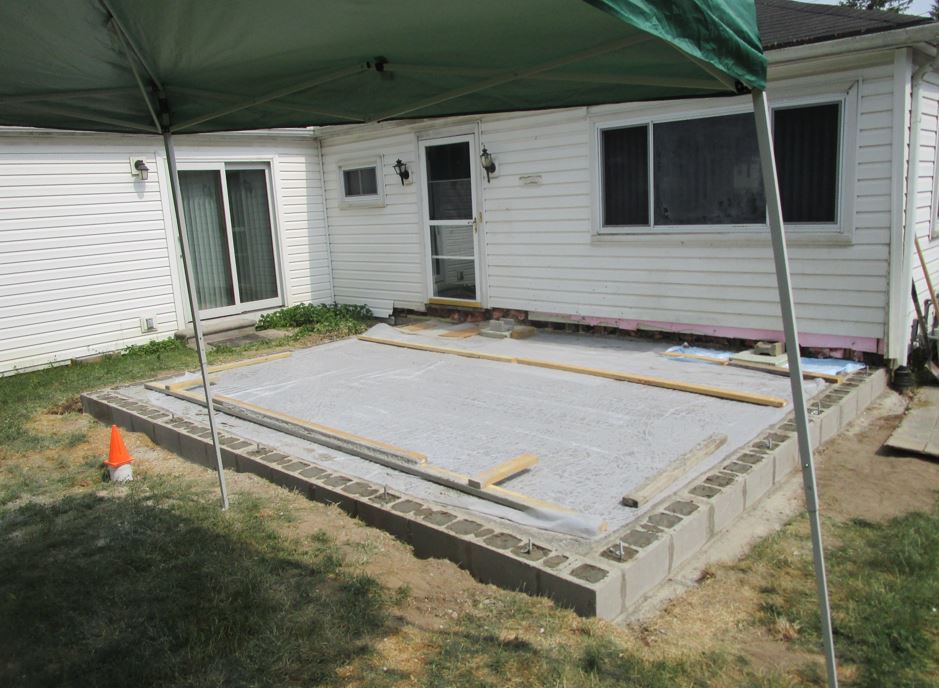
What a bugger this job turned out to be. I'd never done a slab, and I learned the hard way. They gave me a dry load, and getting to level (as it was solidifying quickly) was rough. We did the best we could, and got it reasonably level, but far short of what a pro would do. Basically I got my ass kicked. It was a very humbling experience.)
(Dave and Dan as helpers. The 18' long screed board was really hard to pull thru the dry concrete.)
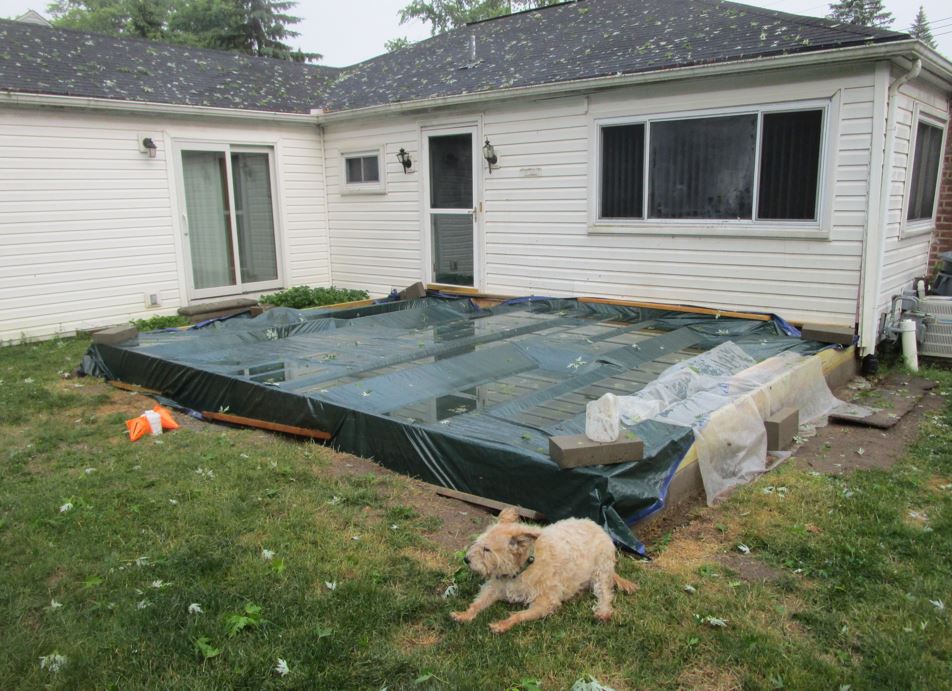
Sill plate and rim joist installed. Had to use tarps to cover things for some big rains we got. The rain this day was a humdinger, lots of rain and hail. The tarp worked so so, and it was a lot of work getting the water pools off of it.) (Sandy helped where ever she could!)
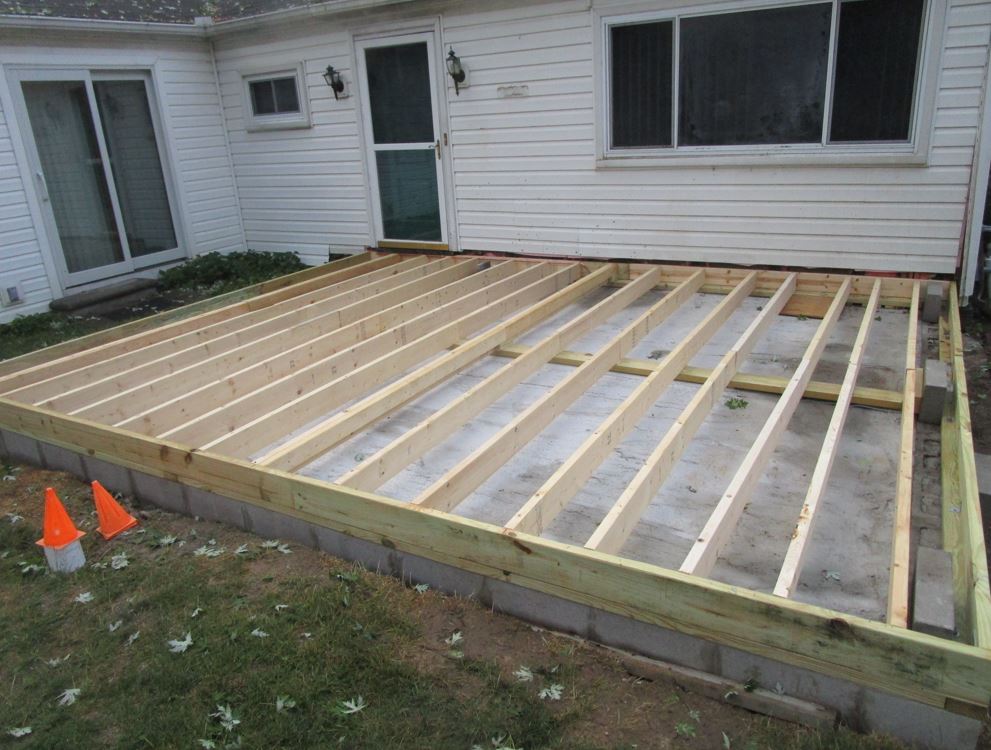
I spent an entire day shimming both ends over every single floor joist on top of the lousy slab we laid down, but that did the trick to get a level floor.
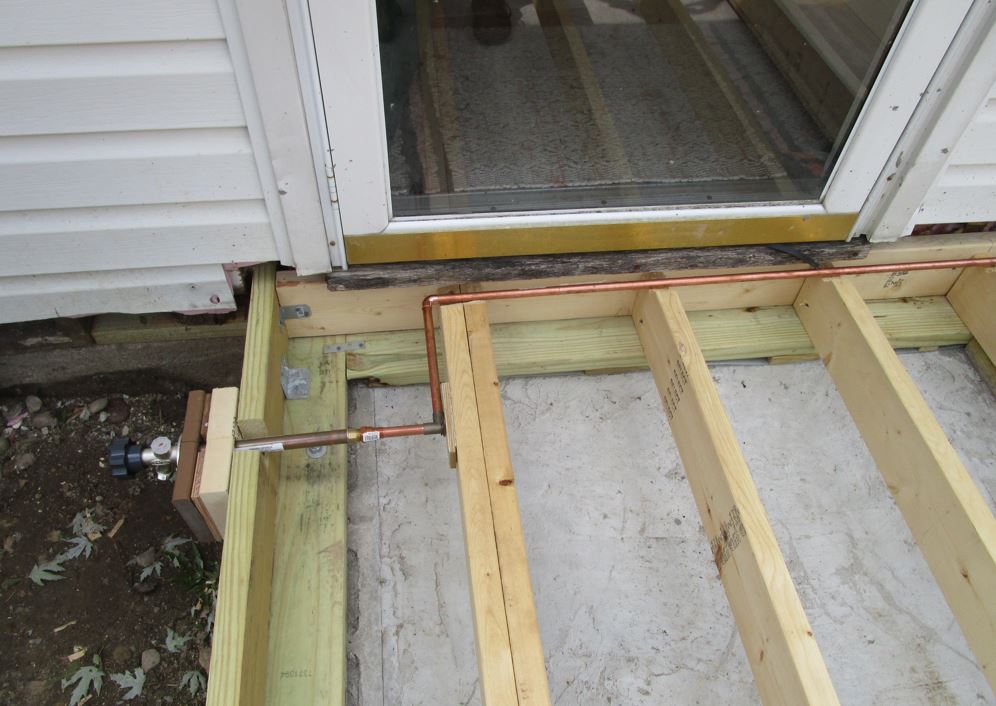
Also a little plumbing installed for a hose bib. (Getting the braze joints under the joists was tricky.)
Putting in the long supply duct run, and the short return one.
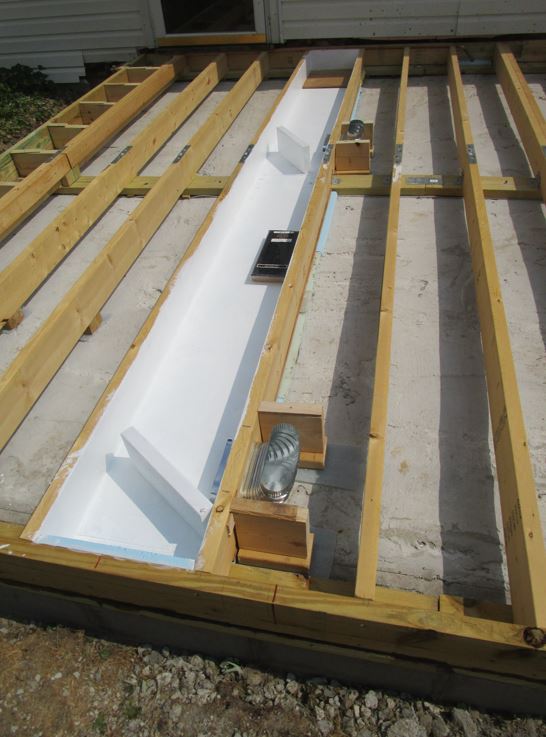
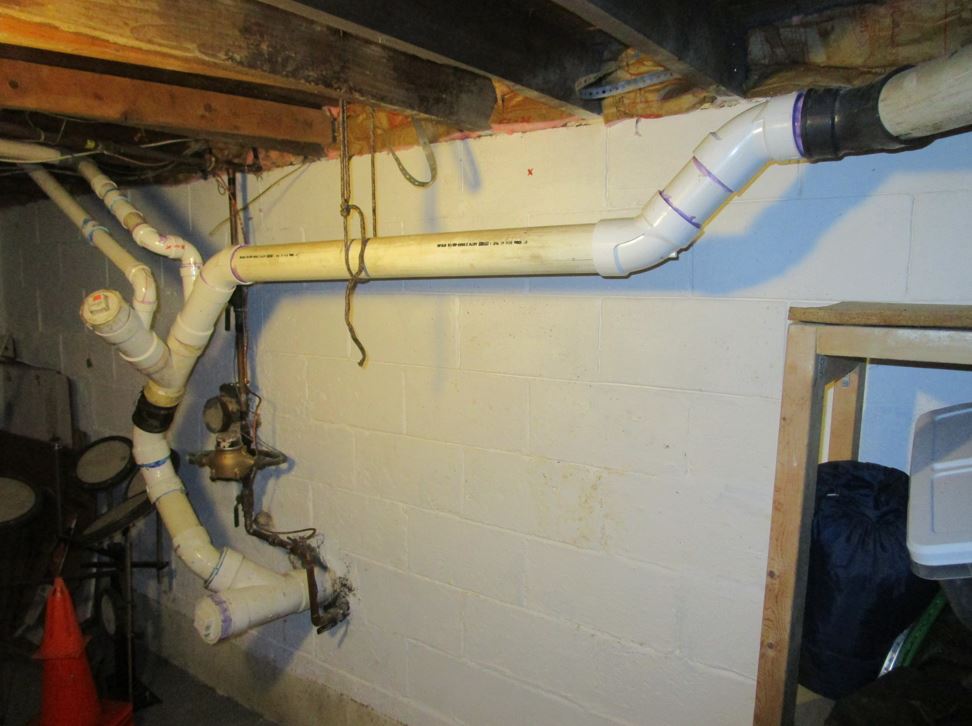
This job was a bitch - I had to shift the main (sanitary) drain line down by a foot, and then bust a hole thru the existing foundation for the supply duct run, then figure out how to support one of the floor joists that lost it's footing. (There is a similar hole for the return run. My arm was sore for a month after all of the pounding with a 5 lb maul.)
And actually the cinder block wall is NOT the foundation - that is 2' further out. This is the wall for the Michigan basement that was installed at some point after the house was built.)

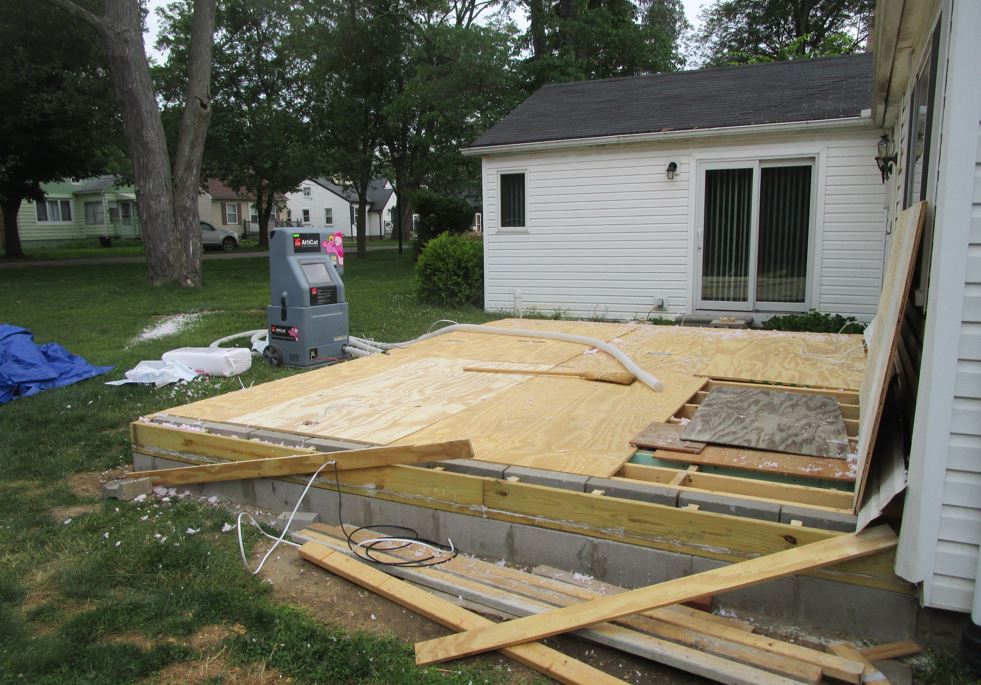
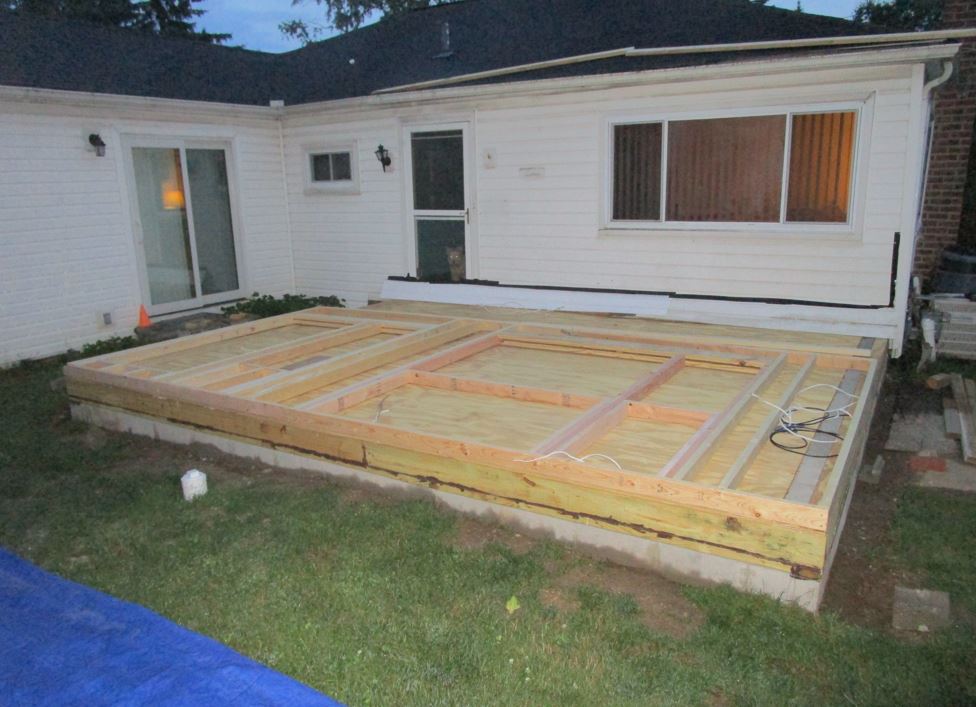
I even blew in insulation in between the floor joists. I spent so darn much time working on the slab and floor that some people thought I was building a large deck. But I did finally start building upward - the first wall is about to go up here. (I actually felt a bit sheepish when I finally started doing that. (Looky here neighbors, it's not just a floor I'm putting in!))
Getting the first stud wall up by myself was tricky. I used a rotating board ratchet system that ended up working well. (One neighbor saw me doing this and sorta watched with a concerned look on her face. Ya gotta get pretty creative to build things like this by yourself.) (July 5)
Getting the two top pieces of framing up was also tricky, and I wasn't sure I could do it by myself, but by golly I did. (It was a lot easier to build the two side walls in 2 pieces.)
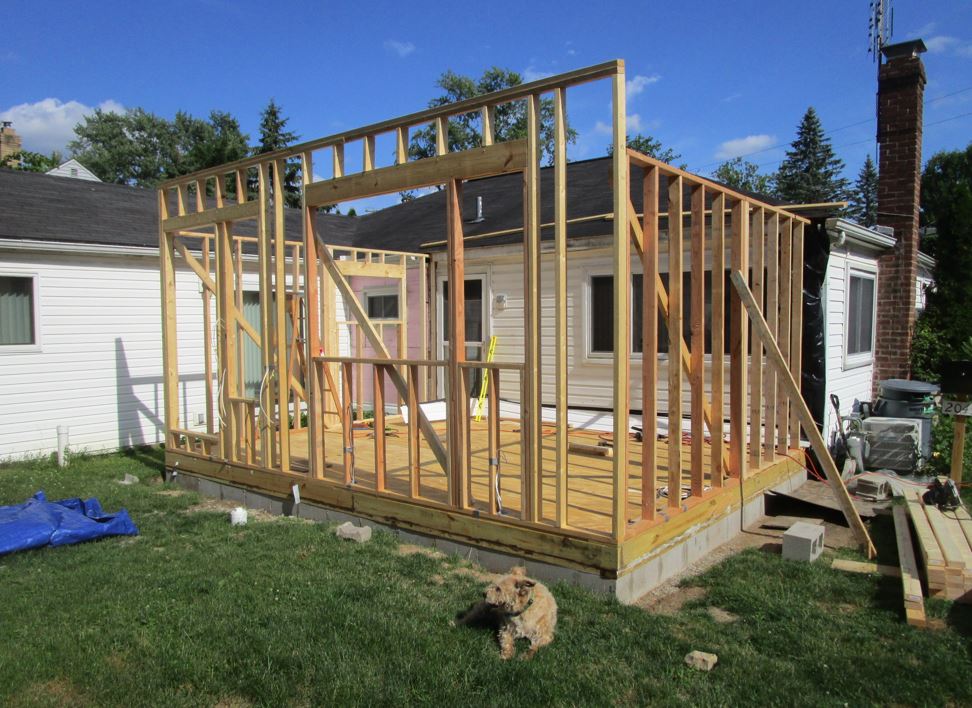
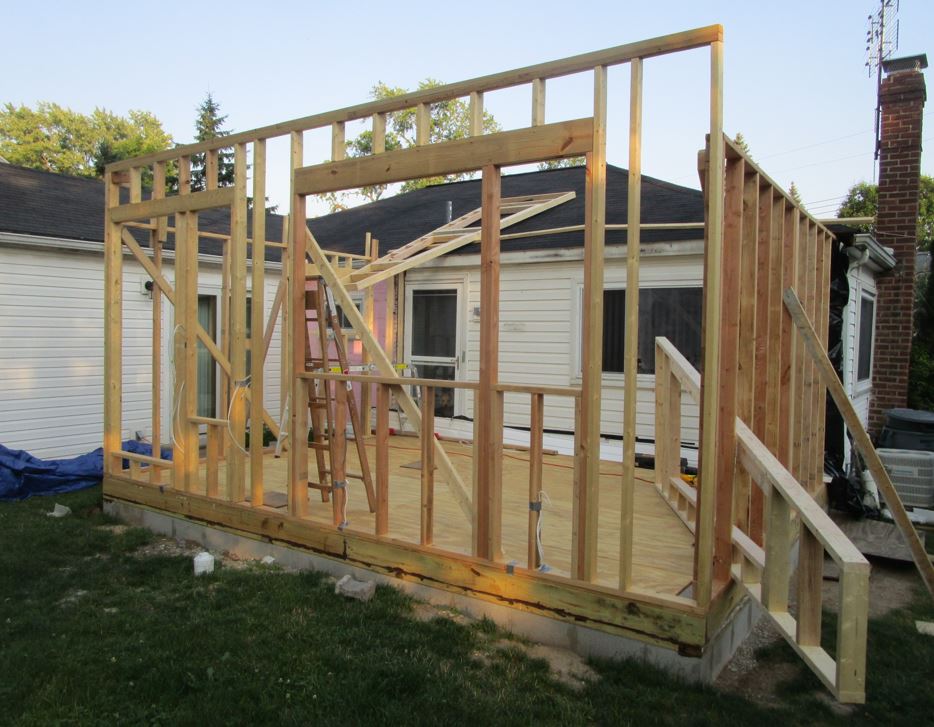
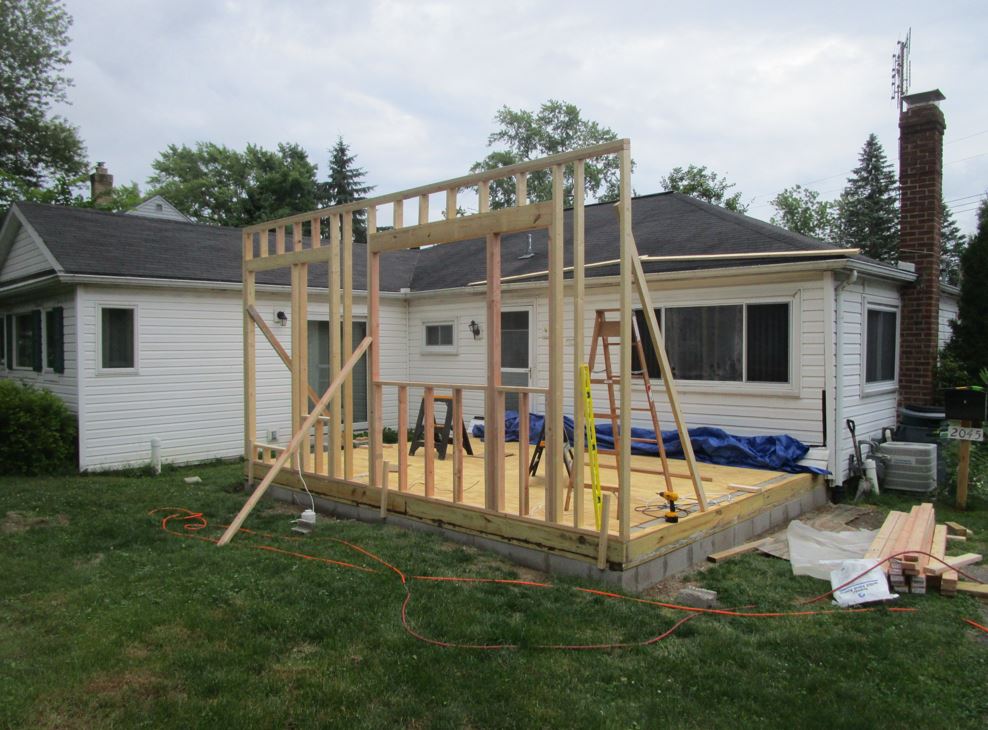
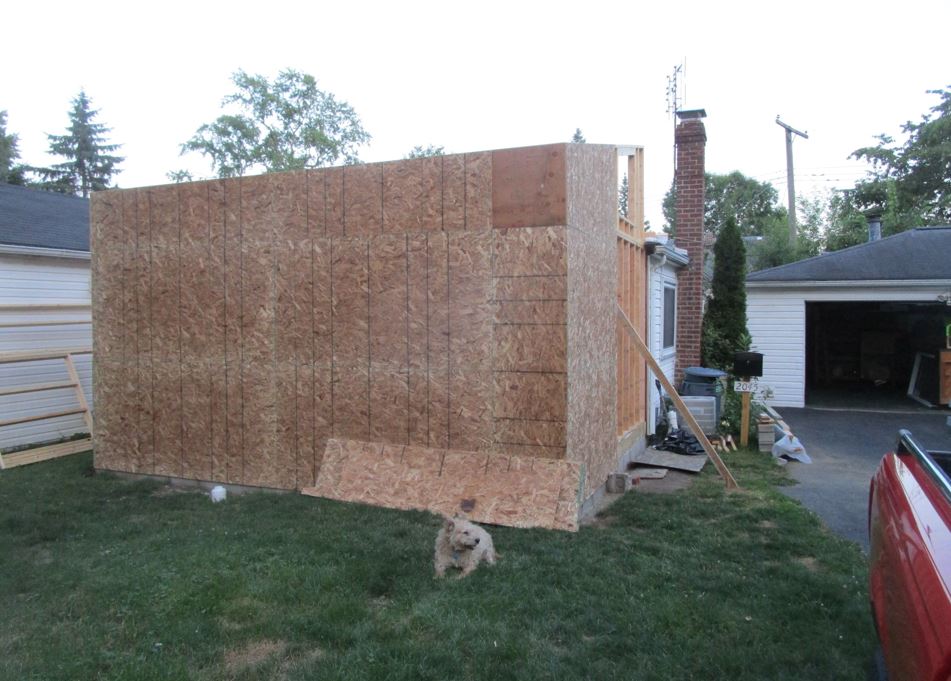
Wall framing about done, and much of the sheeting installed. (Putting up 4x8 sheets of particle board was no picnic, but I managed.)
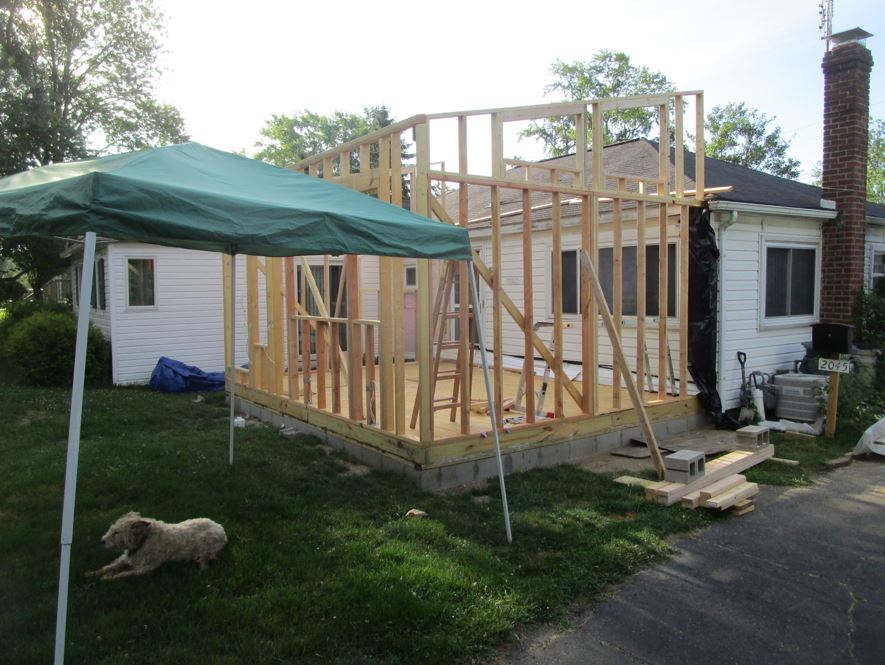
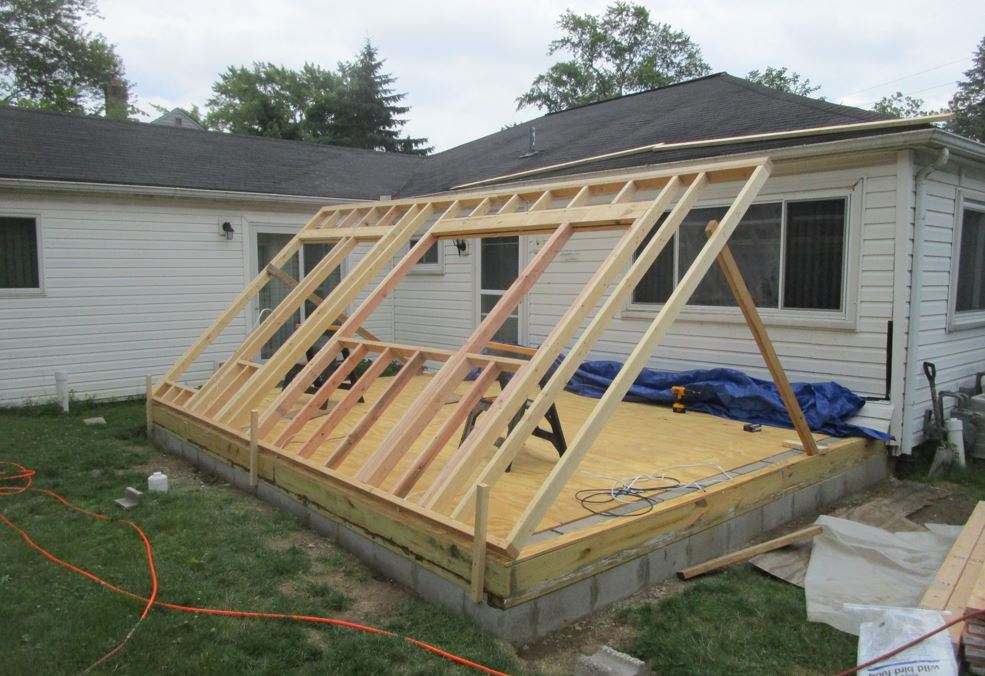
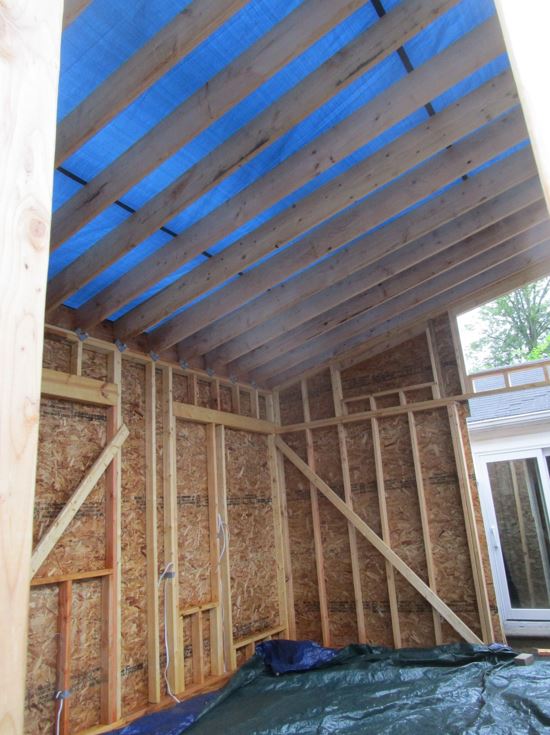
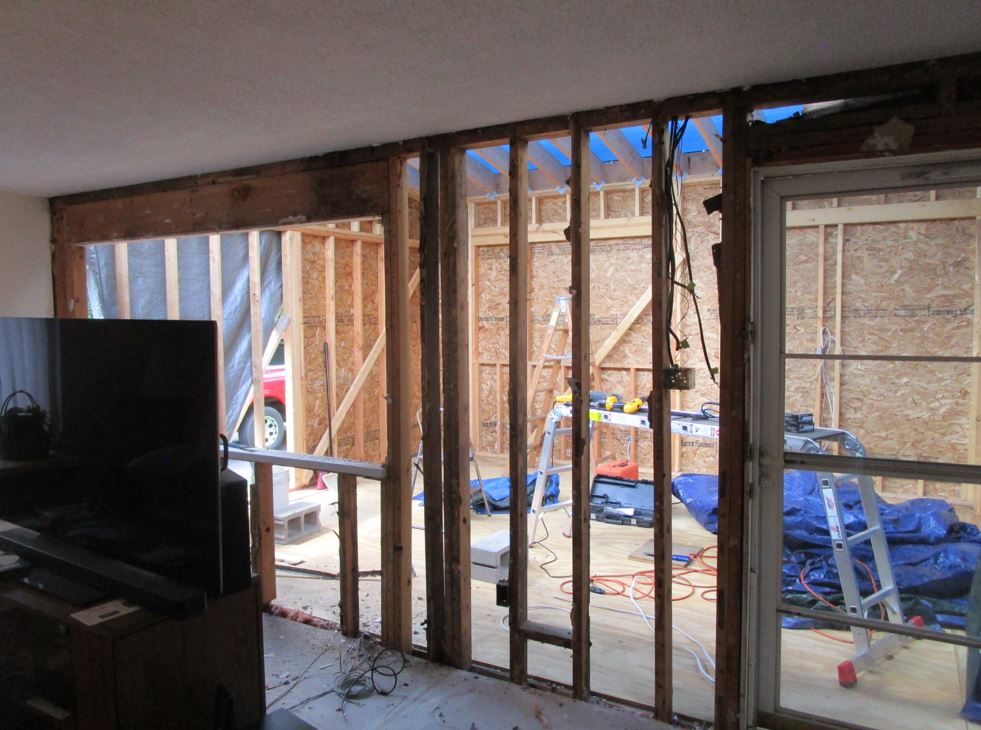
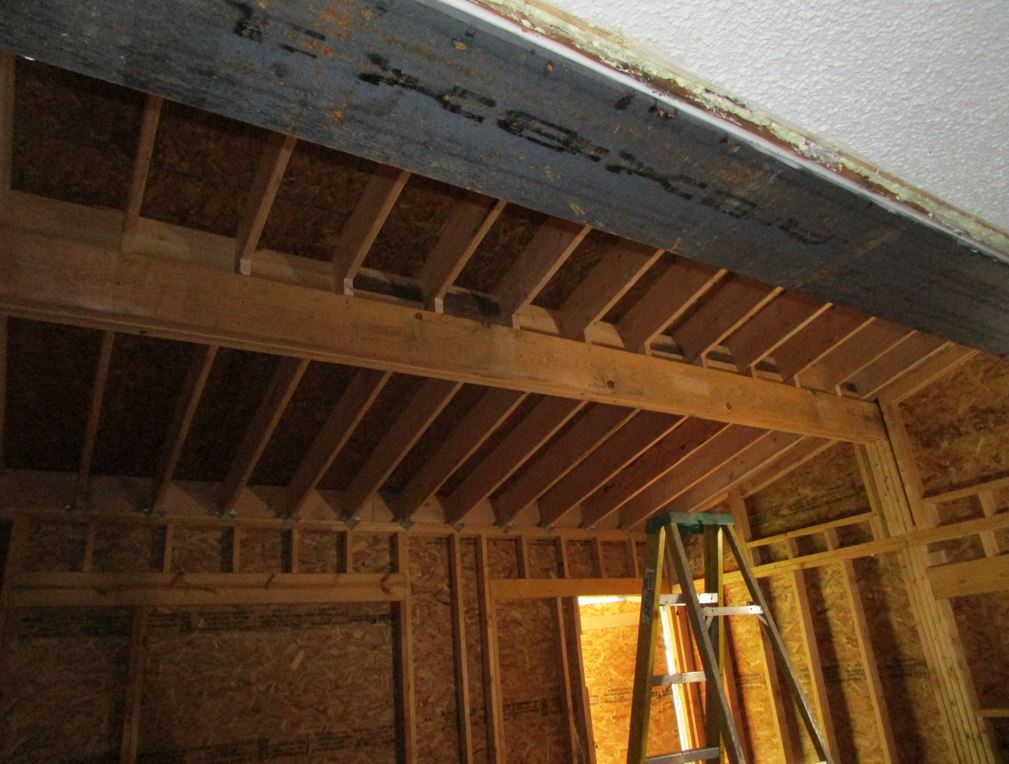
Celling joists installed, and lots of tarps applied. Getting the joists in was a trick, since the wall that would eventually hold them wasn't installed yet, and couldn't be until the existing wall came down and a new beam went in. (That part of the job - including the (rain) water control - was a bitch.) A temporary beam was installed to hold up the joists until the wall went in. That part worked really well.
Working with all of the tarps and a very wet month of July was a bugger. Notice the roof tarp - it worked well, but I very stupidly left it without dropping it down the wall a few inches. Not doing that allowed the next rain storm to dump every drop of water that the tarp caught to flow down the inside of the wall an into the lower tarp. I just needed to adjust it by a couple of inches. (That was a really stupid move on my part, and I learned the hard way!)
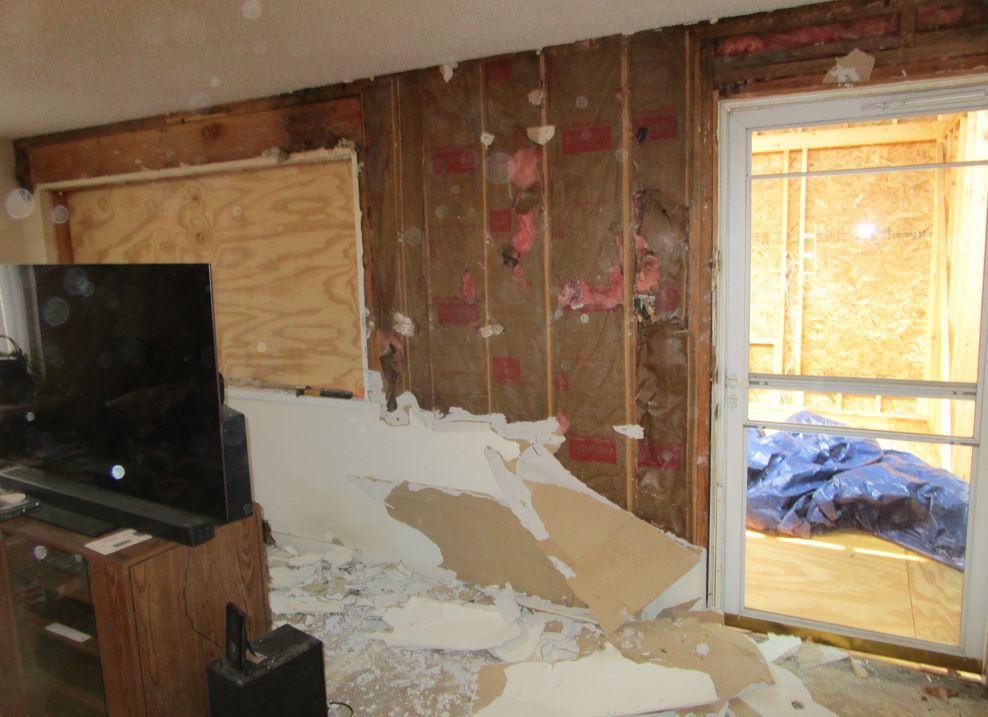
Tearing down the existing (load bearing) wall. Normally this wouldn't be done until the roof and walls were all buttoned up, but as I explained, since the roof needed the beam and new upper wall section, I had to tear the wall out before I could put in the roof, which made water management next to impossible.
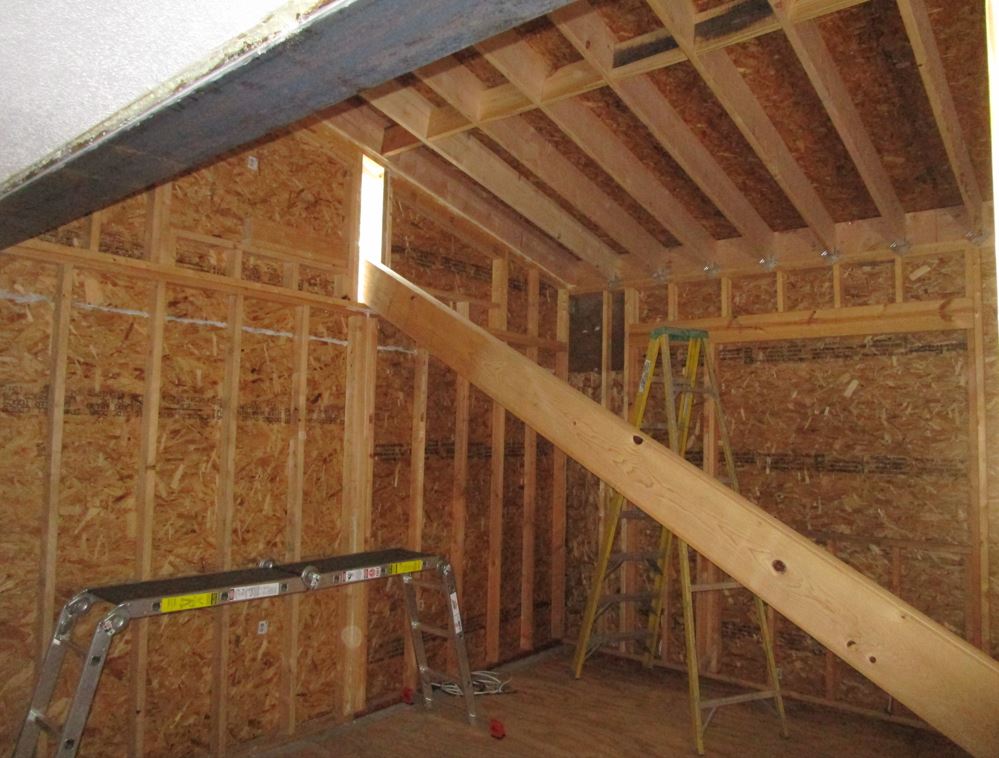
Supporting the ceiling with the wall down, and getting ready to install the new beam. I used a heavy steel L beam (vs an I beam). I calculated all of the loads and spec'd it out and it worked out perfectly, but installing it was really tricky. (July 18)
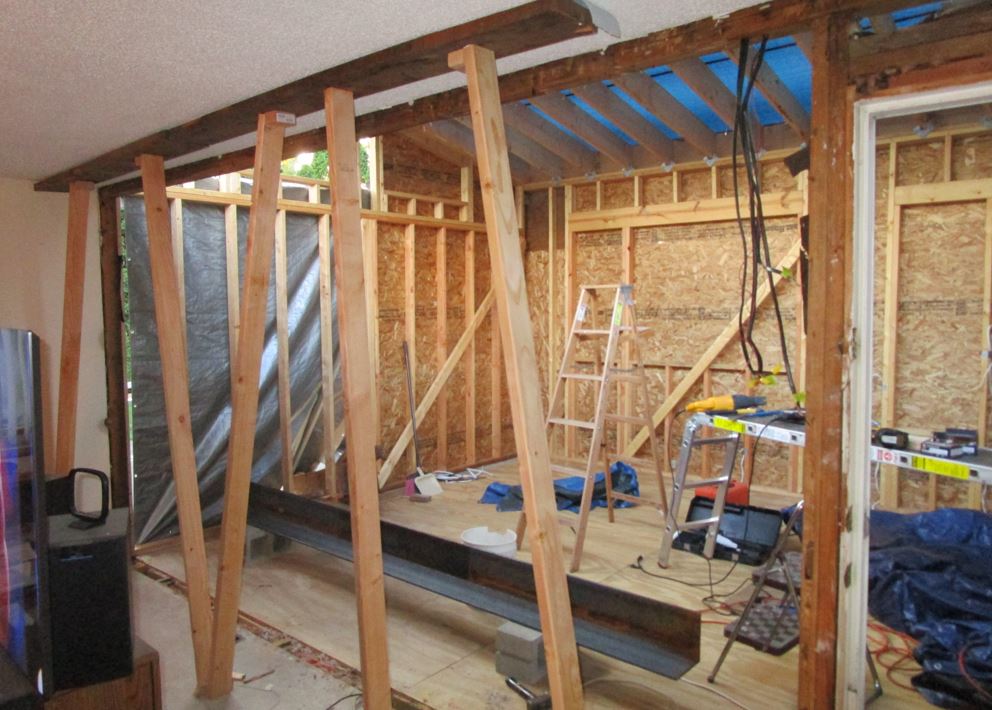

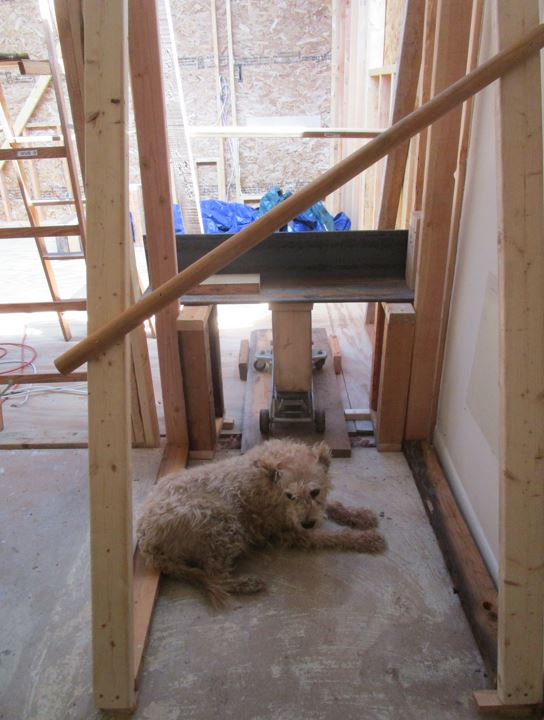
The big beam is installed, and no one got hurt! I did it with a lot of wood bracing, and a floor jack with the beam more or less balanced in the middle. (It was crude but effective!) And Sandy offering to help with the small beam. (I had the beam split into two to make the install a bit easier.)

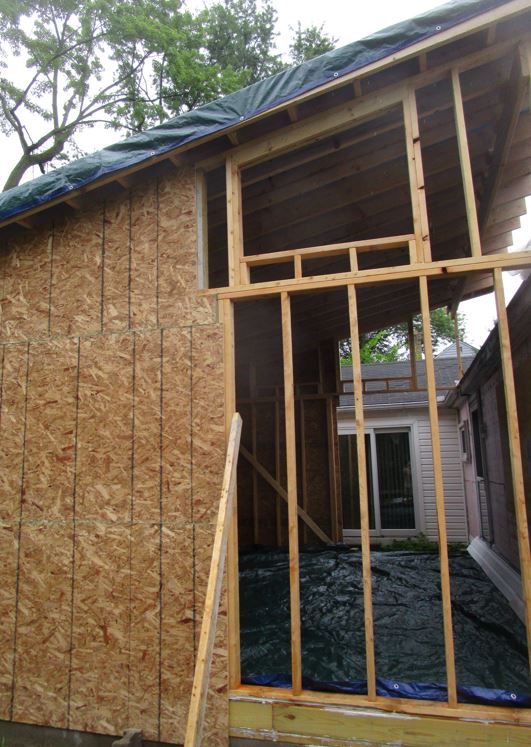
The beam(2) all installed. Notice all of the open sky above in in the picture on the left. Putting in a wall there was the next job, but that took some time. That is when the tarps were the most vulnerable before that wall and the connecting V roof was also installed - and it rained a lot that week wouldn't you know.
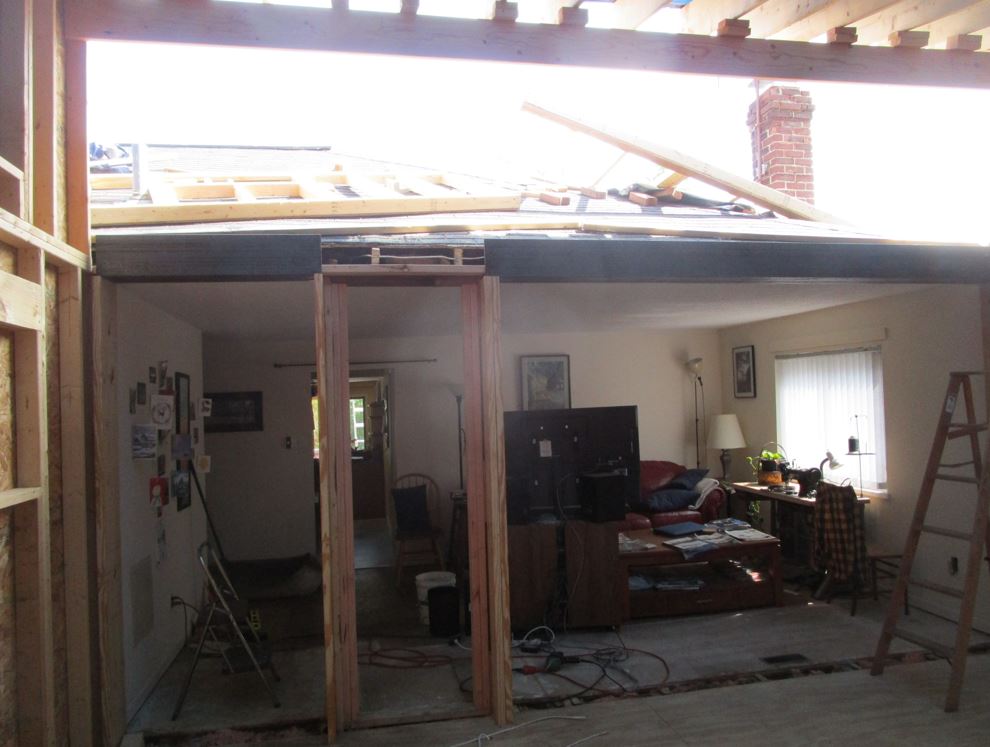

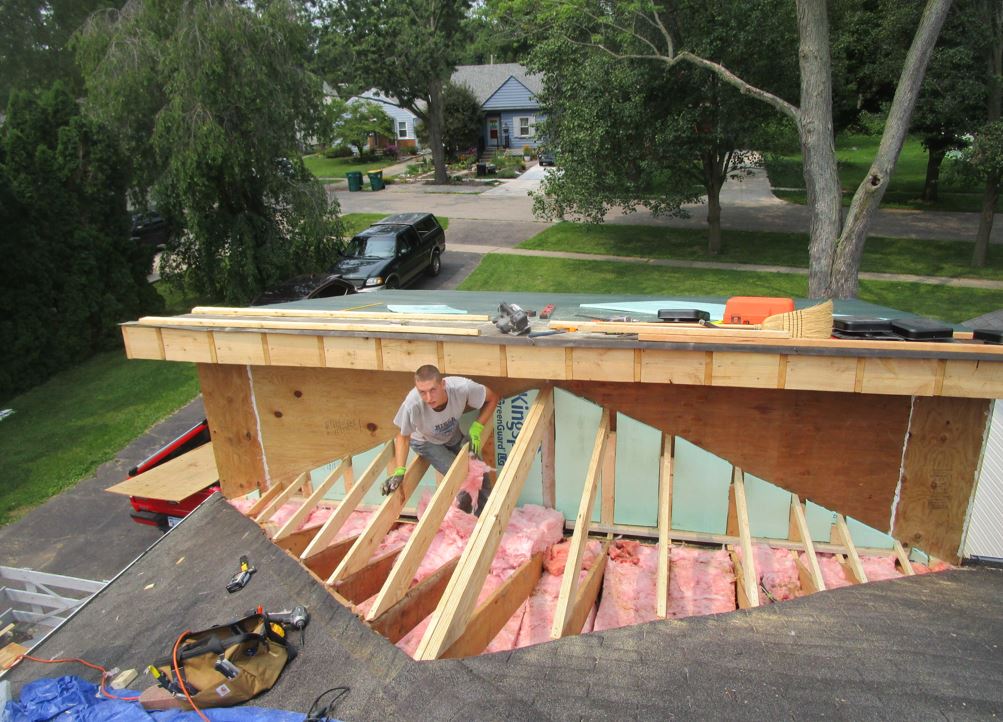
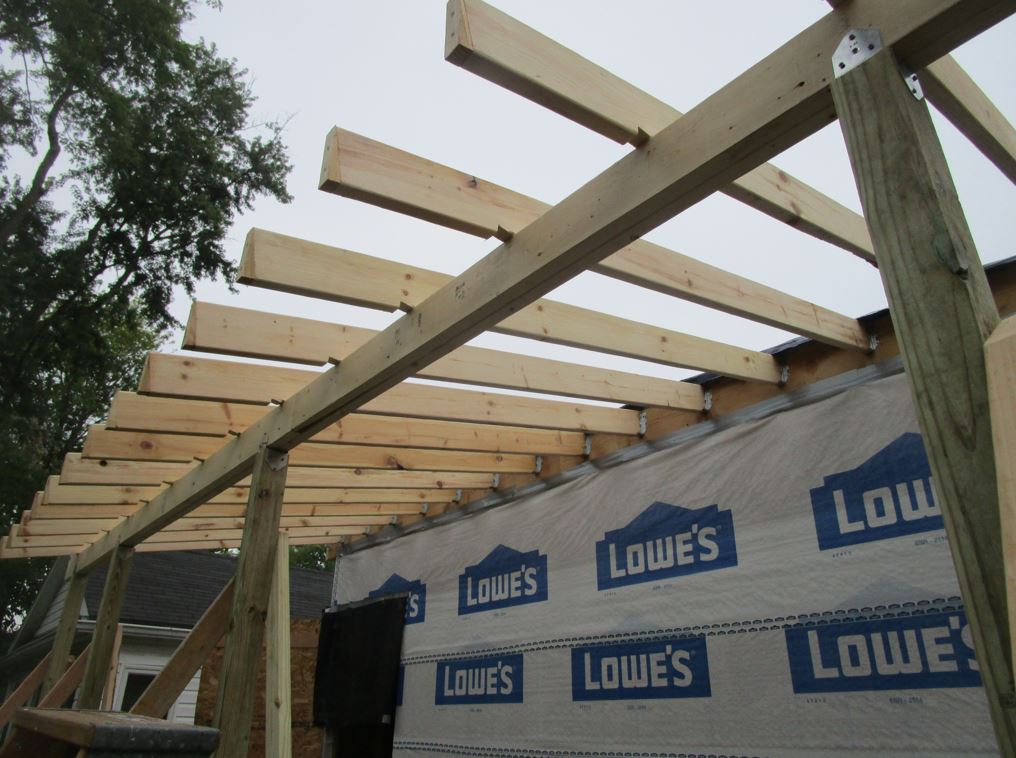
Getting the all important "connecting roof" framed and installed. I hired a young guy for some of the trickier framing work. He was the son of some good friends and worked out really well. (Finding any decent help for a project like this wasn't easy. Contractors vs (do-it-yourself) homeowners don't usually mix too well!) (August 1)

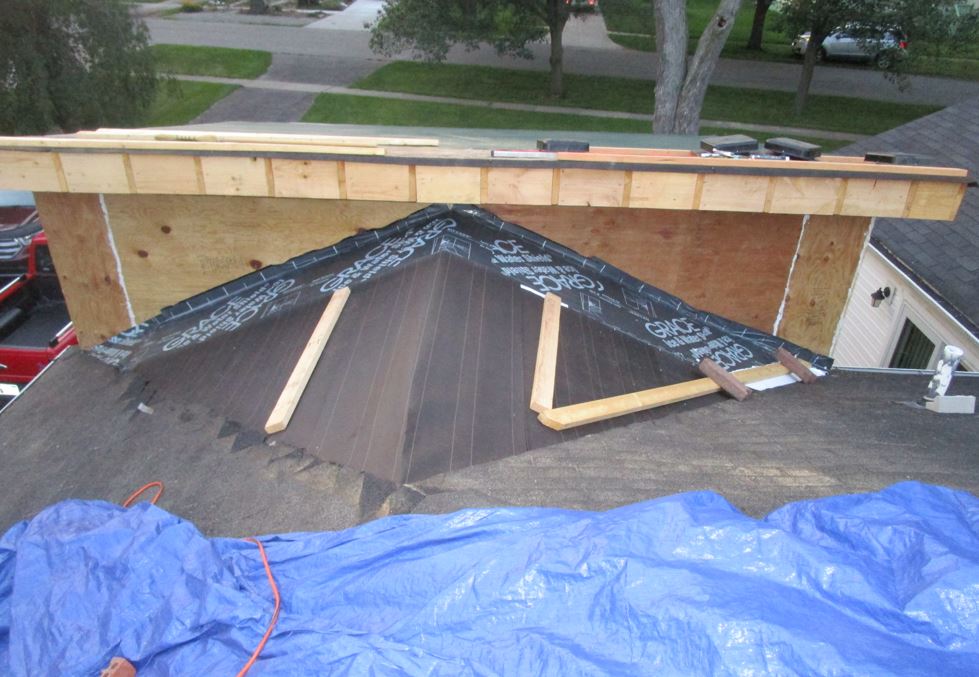
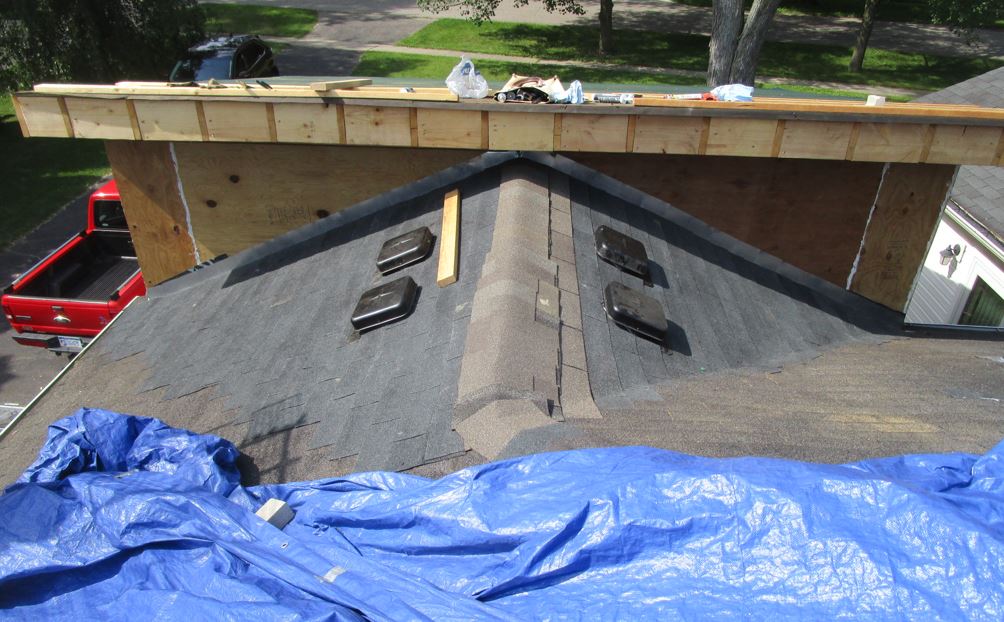
I added some roof vents and did the small amount of shingles myself.
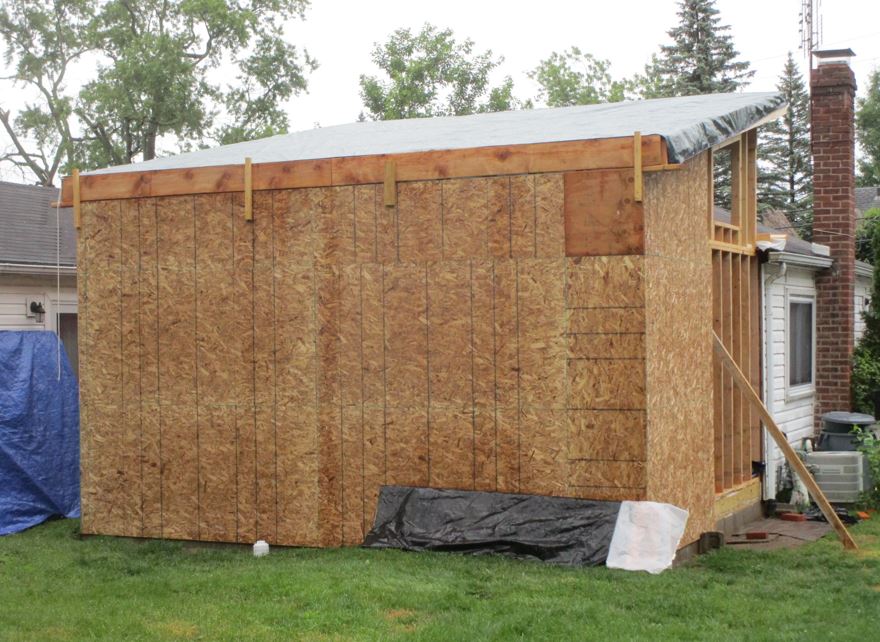
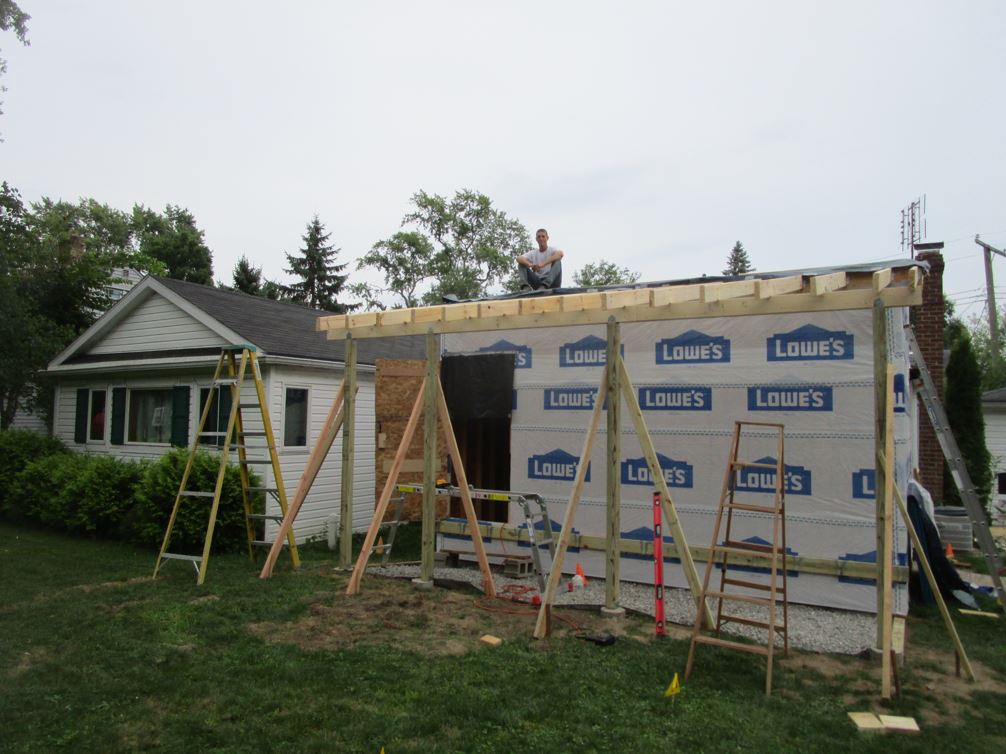
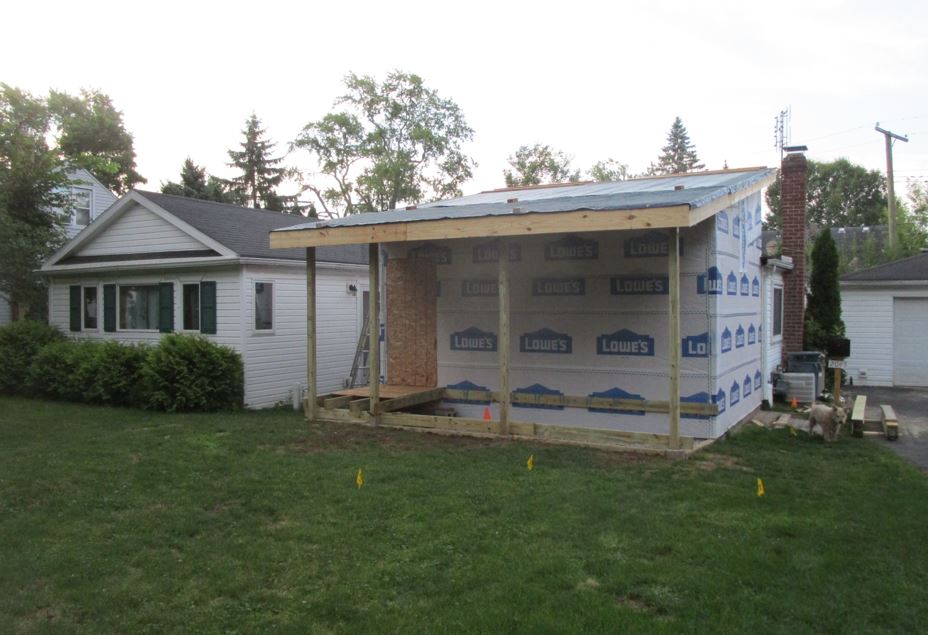
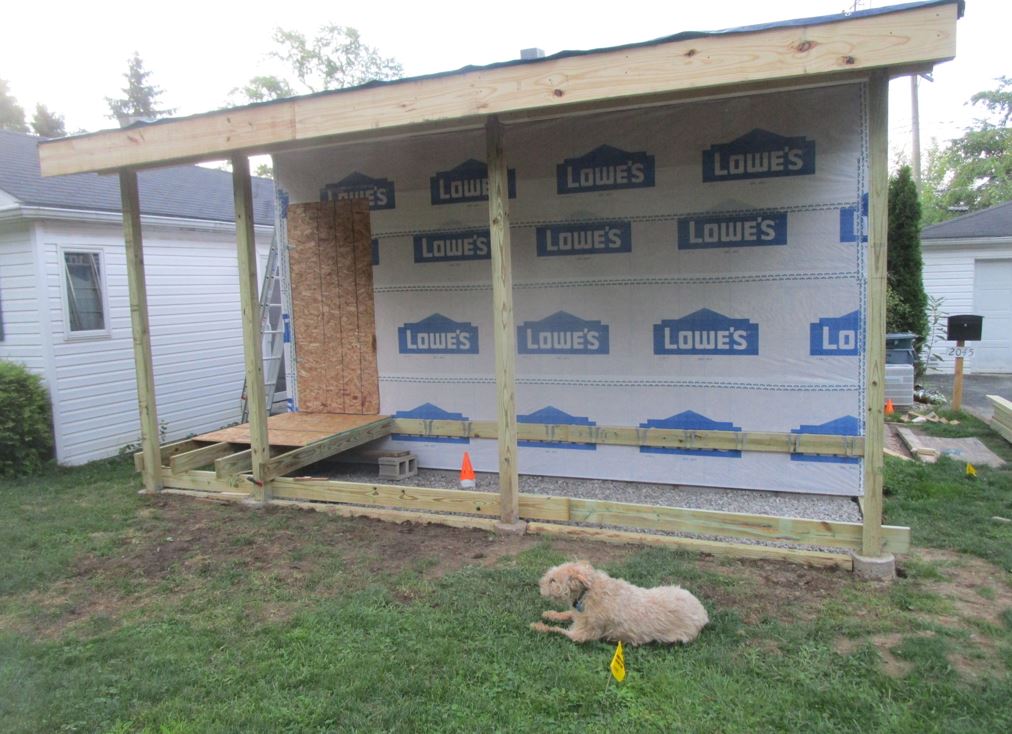
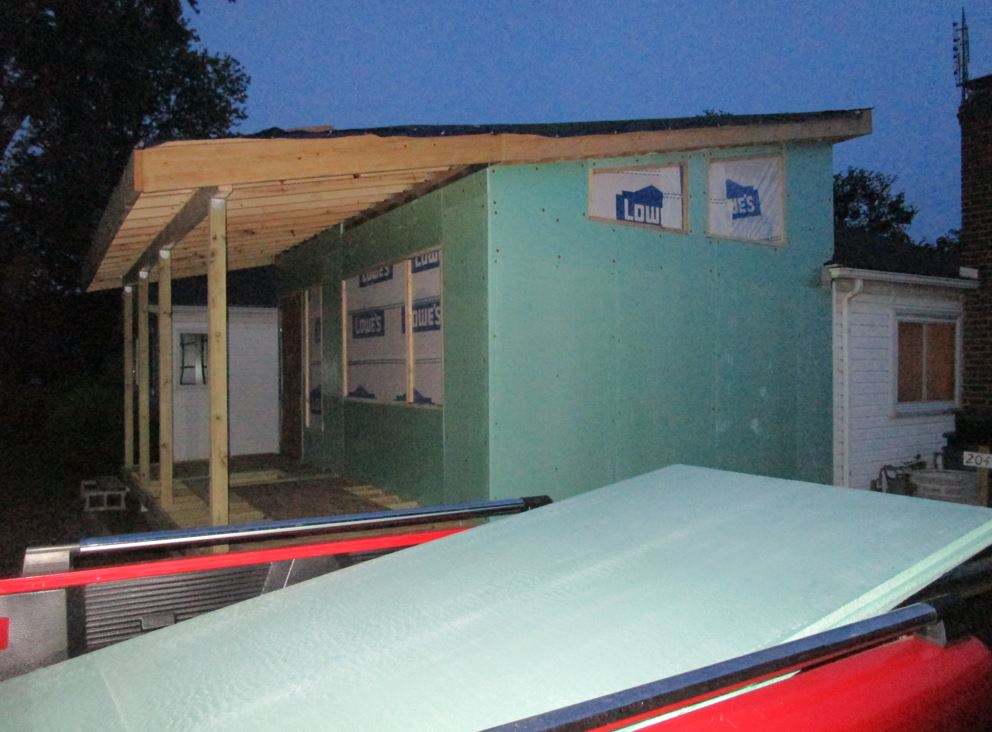
The monolith! (I'm pretty sure most of my neighbors were shaking their heads thinking I was nuts at this stage of the project, and I can't blame them.)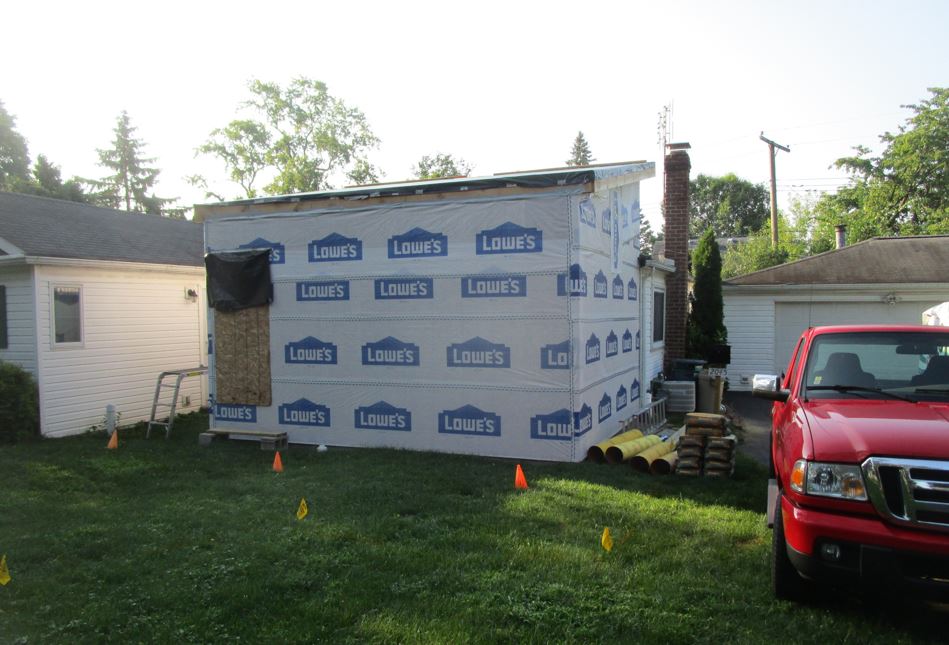
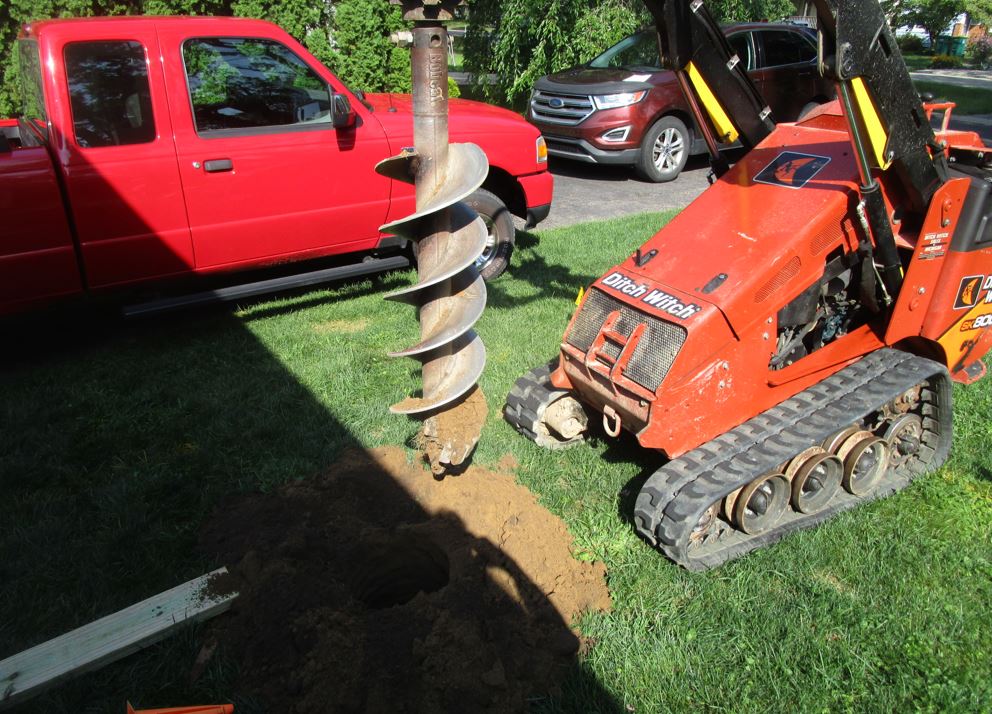
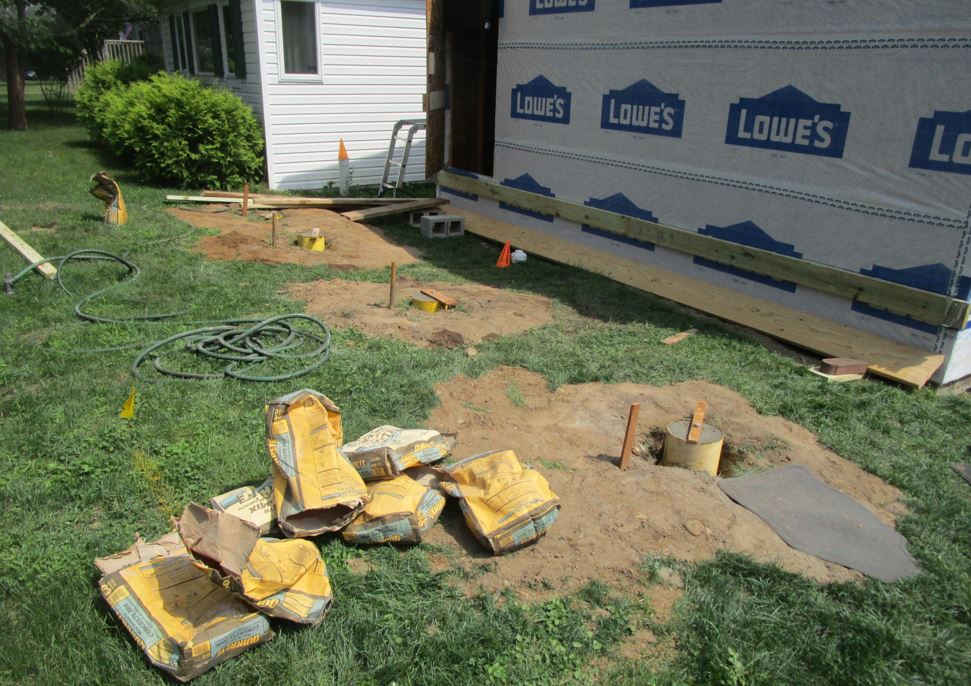
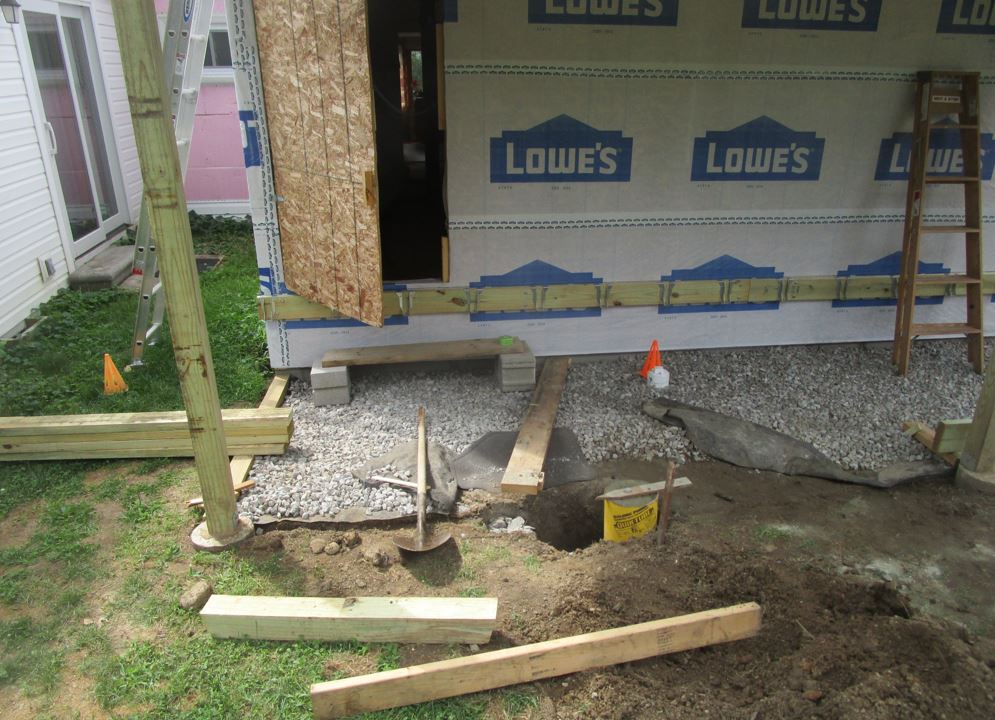
Putting in the post holes for the porch. I was planning to hire that out, but the guy never called back, so I rented the ditch witch and did it myself. Operating that thing was not bad, and kinda fun. Filling the forms with hand mixed concrete on the other hand, was some work.
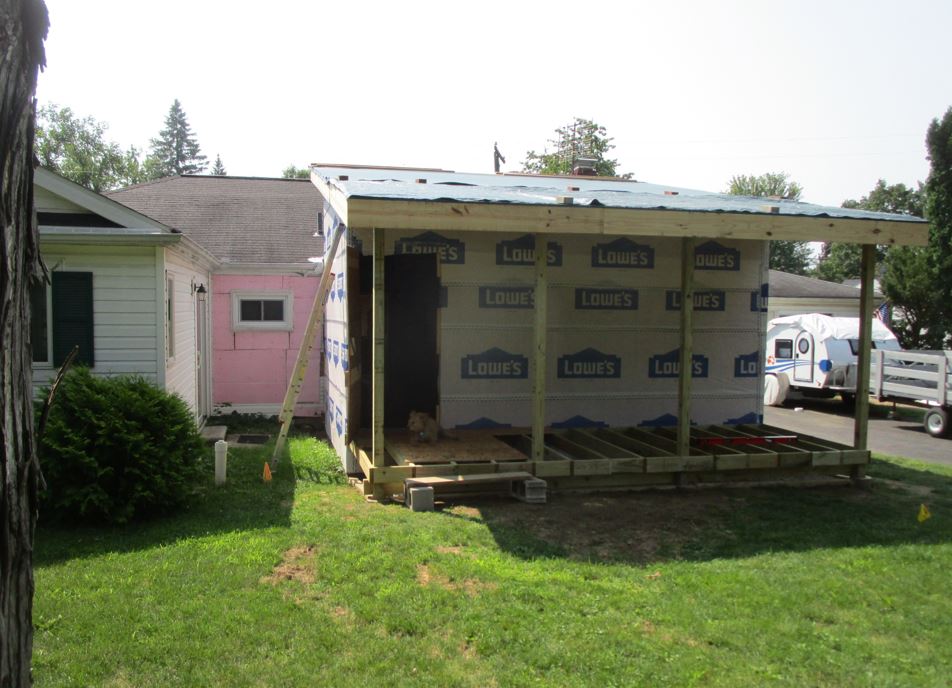
Porch framing. Tricky, but not too bad, and again I had my helper Tom.
Notice the spacing of the posts. I had intended to place the two on either side of the steps closer together but I put them too close as I discovered.
I spent an entire day "moving" one post about 18". You don't move a 42" deep concrete post, you bury it and put in another one next to it. (This one I dug by hand.)
But after I fixed that, I realized that the 3 posts on the right weren't evenly spaced as I wanted. I was going to let it go, but it eventually bugged me and I shifted the position of the one 2nd from the right. (I did that without digging a new post hole. Not ideal, but it should be fine.)
The central (wooden) beam going in. I didn't actually need this to support the roof, but given I had the cathedral ceiling, I decided I wanted a center beam for aesthetics. I managed to install it myself. Having the open pocket on the left was the key to being able to make it fit. (I noodled a few things out pretty well.)
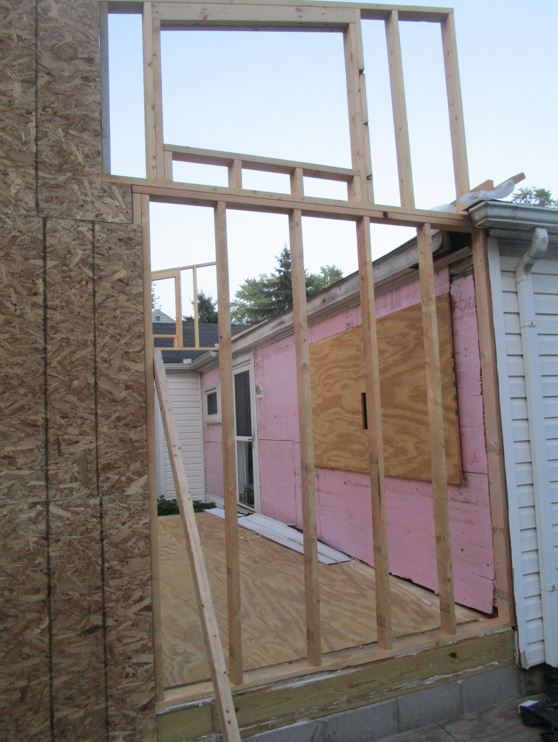
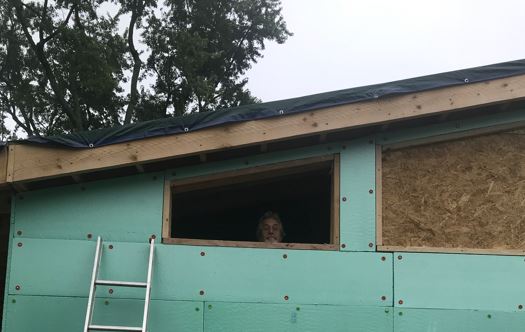
Adding exterior styrofoam (1" thick) and cutting and installing the windows. (It's finally starting to look like a house vs a stockade!)
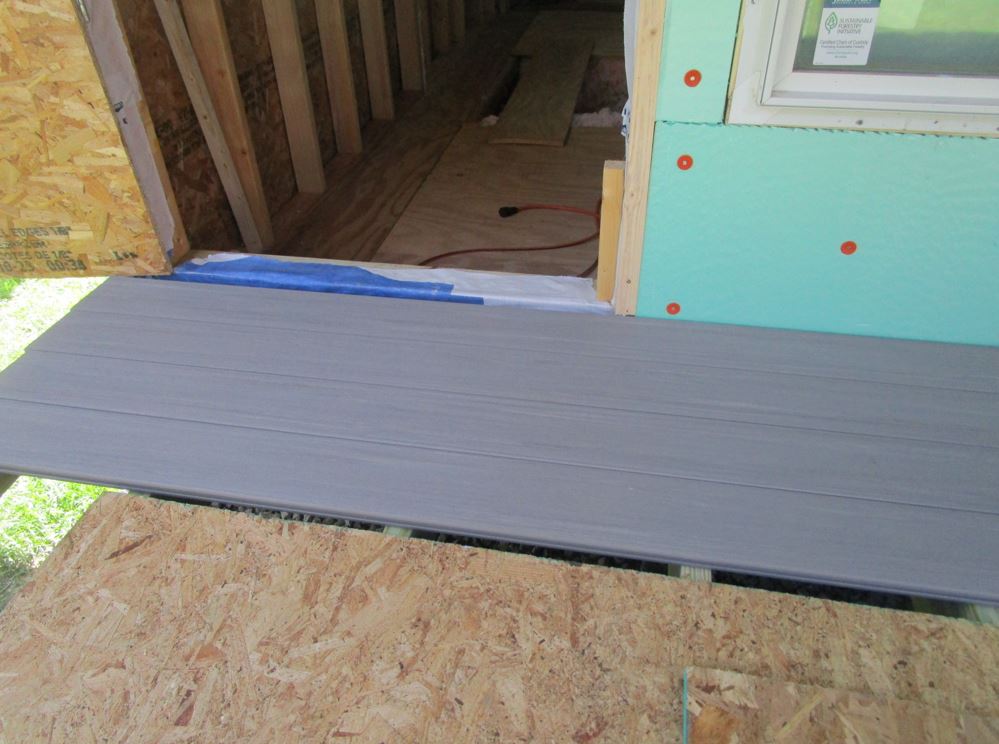
Porch flooring going in. I used tongue and groove there vs decking that would need to be gapped. (The porch was a big part of the addition (emotionally), and I wanted it to look nice so I choose the flooring carefully.)
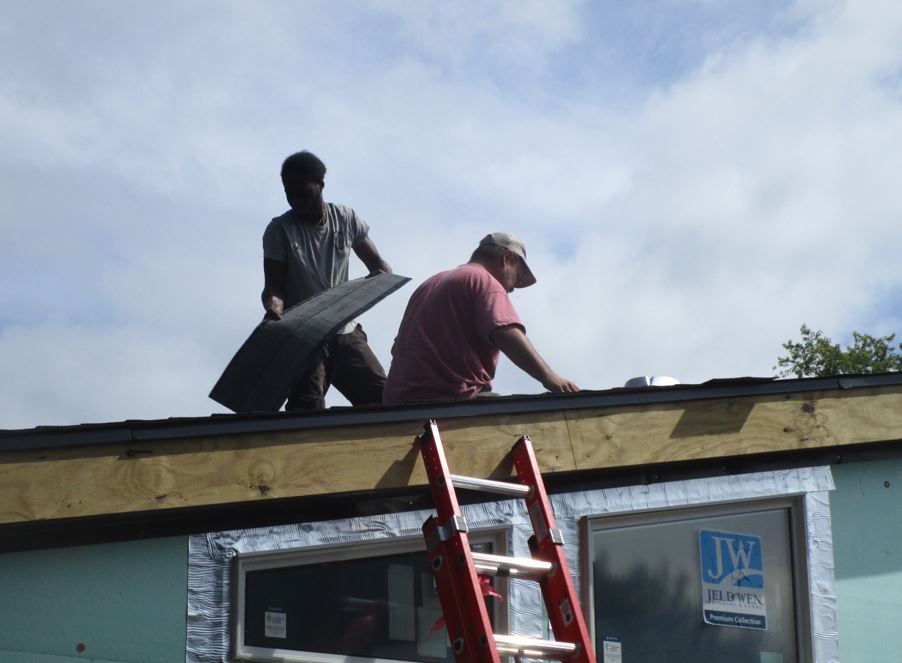
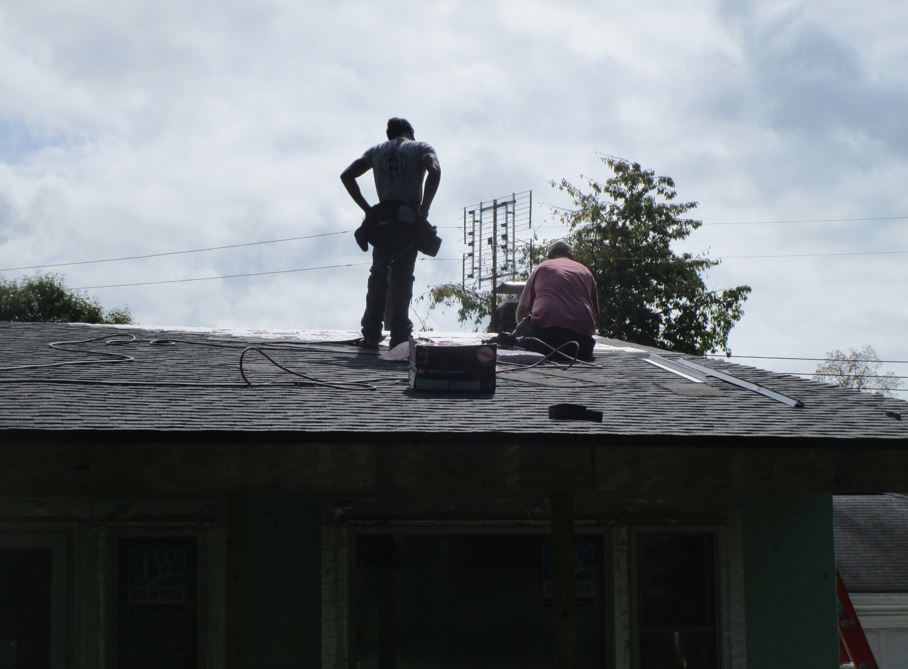
I had planned to do the main roof myself, but thank goodness (said my back and knees!) that I backed off and found a good local contractor. (Newbold - I recommend them.) (Sept. 12)
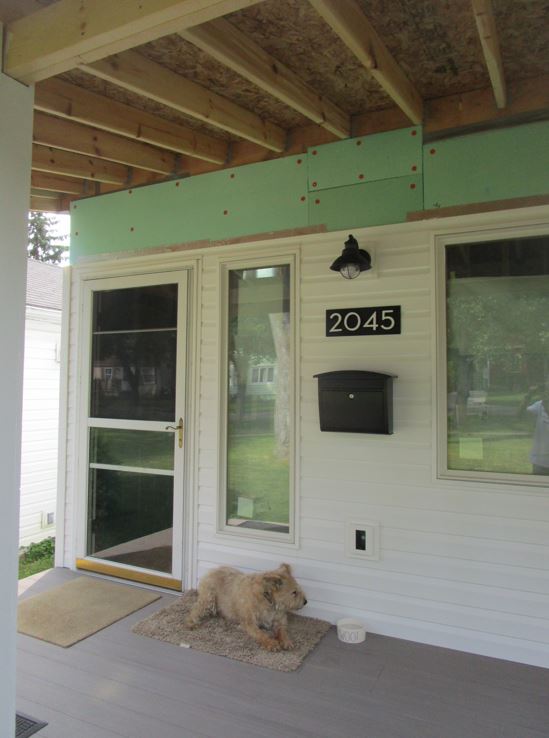
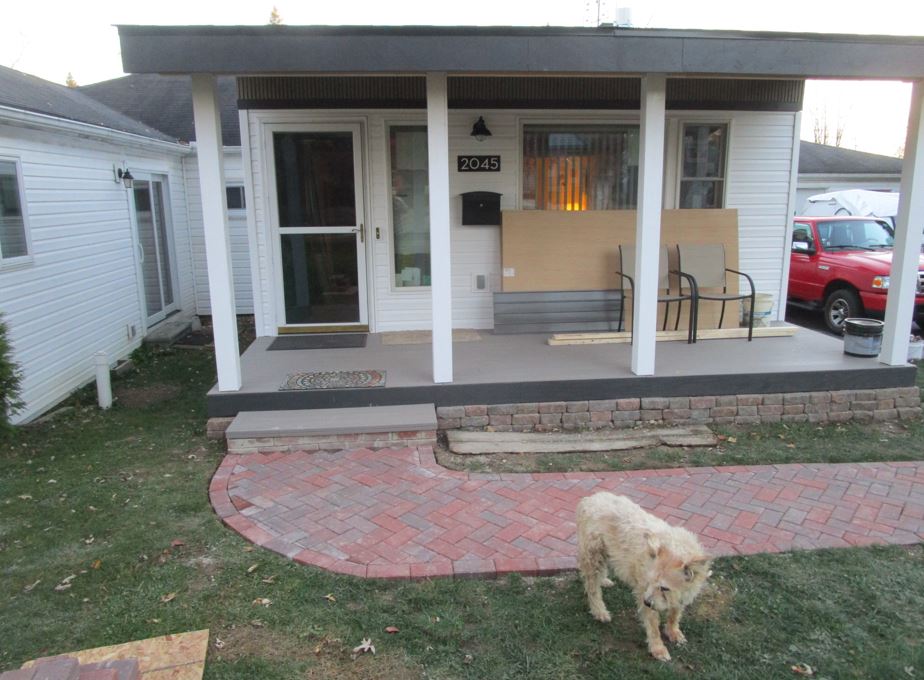
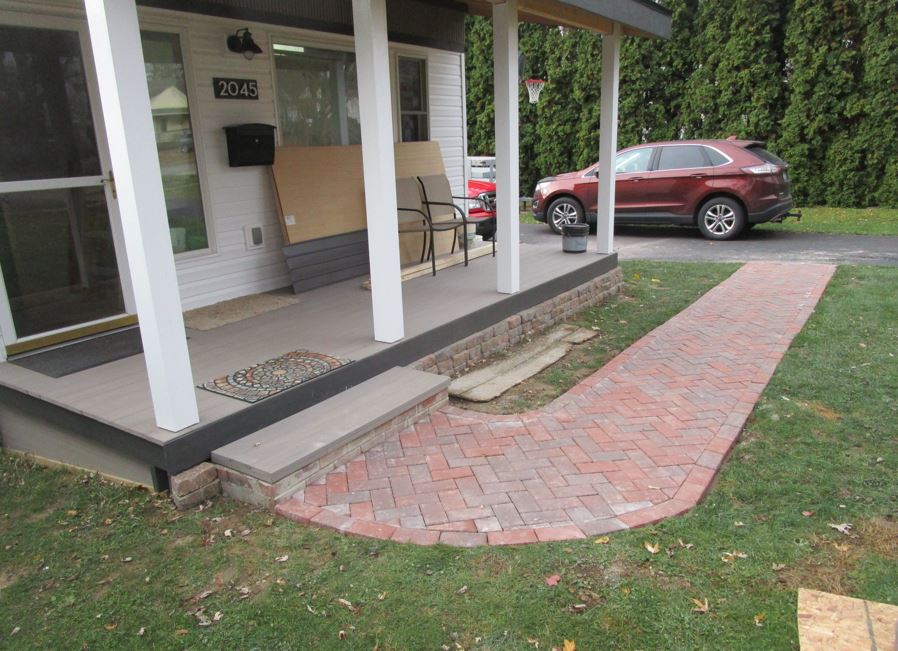
Siding, front door, light, new address numbers, and mail box. Those worked out well, but I must admit, my design didn't include a plan to fit them in.
(I got lucky that I had a good space for them.)
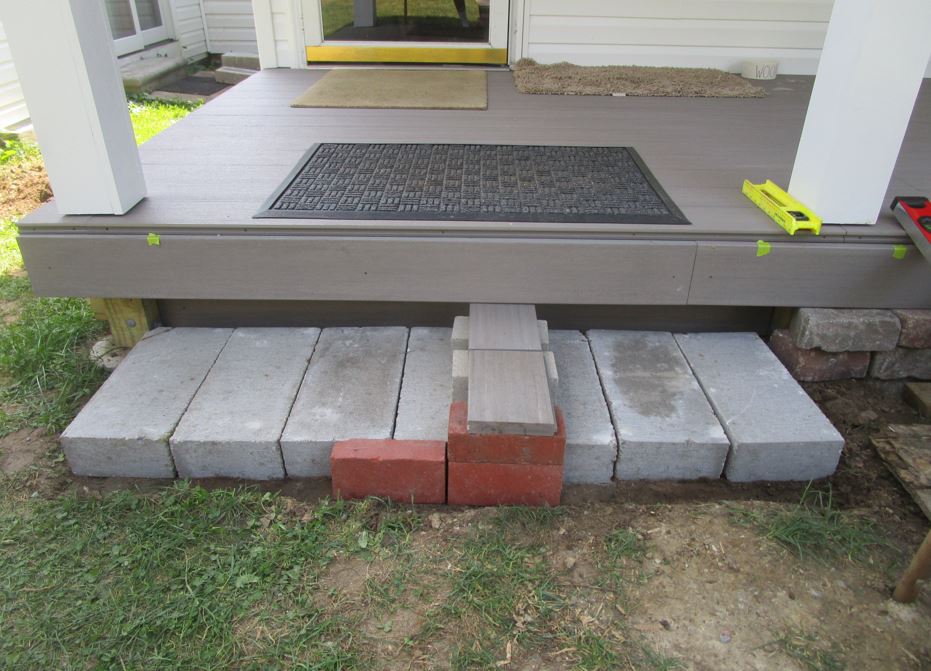
Working on the front step. After all of the work I did moving the one post, I had room for a nice wide one.
You can also see the different trim boards above the step. On the left I used porch floor boards, and on the right it was wood that matched the trim up above by the roof. Selecting the color for the trim was a lot of work. (For me anyhow.) White is common for trim, but I thought something darker would look better, and after trying about 6 different shades, I finally went with "iron ore" - a dark gray. I like it, but there is a mismatch with the previous addition that I may work on in the spring. (Picking colors is not my strong suite it seems!)

Upper siding installed. (After lots of work.) Deciding what to do for the exterior look was a big decision. I finally decided to split the walls as I did and used European style vertical siding on the upper part. After a lot of fussing, I think it worked out great. (I opened myself up for input (and abuse!) from friends while making the decision on how to do the siding. Unfortunately my design didn't have those details worked out a head of time, and after the "monolith stage" I realized I needed to do something to spruce up the look.)


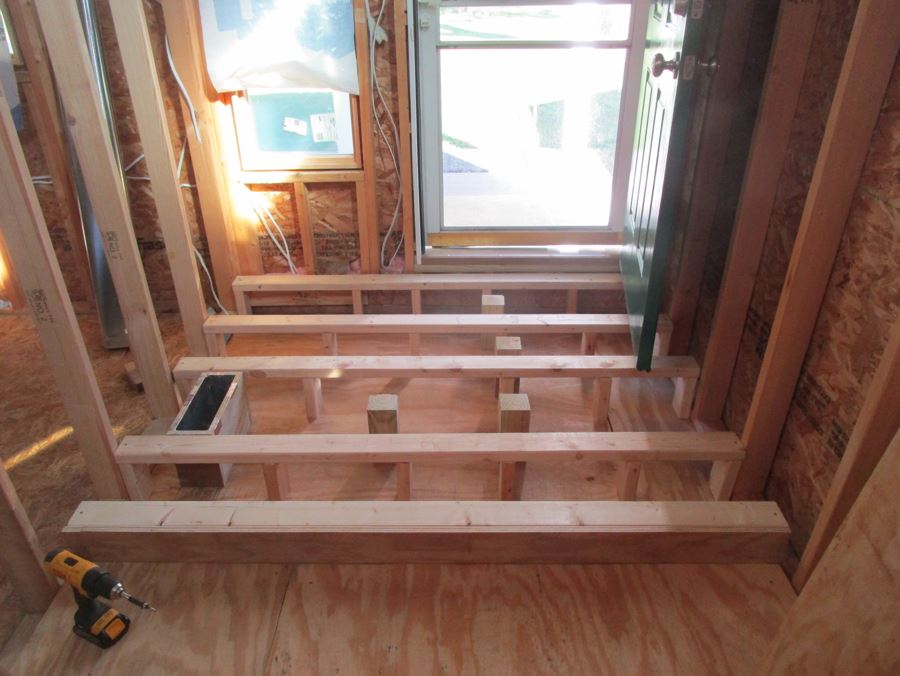
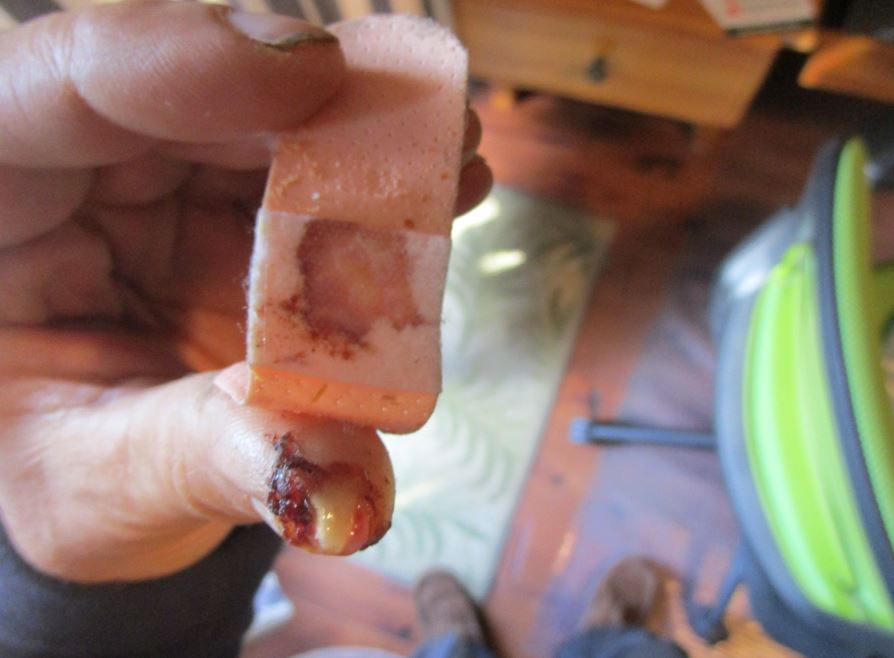
Adding the platforms in the entry way. Deciding to raise the porch up (and the front door as well) was a big decision I made based on the slope of the ground running downhill from the street to my house. The design ended up working out well, but my use of a table saw didn't for my poor thumb. (I was really ticked at myself for getting a buggered up thumb. It happened due to a board getting "kicked back" just as I was grabbing it, but it should have never happened. It was ugly, but thankfully it finally healed up nicely.
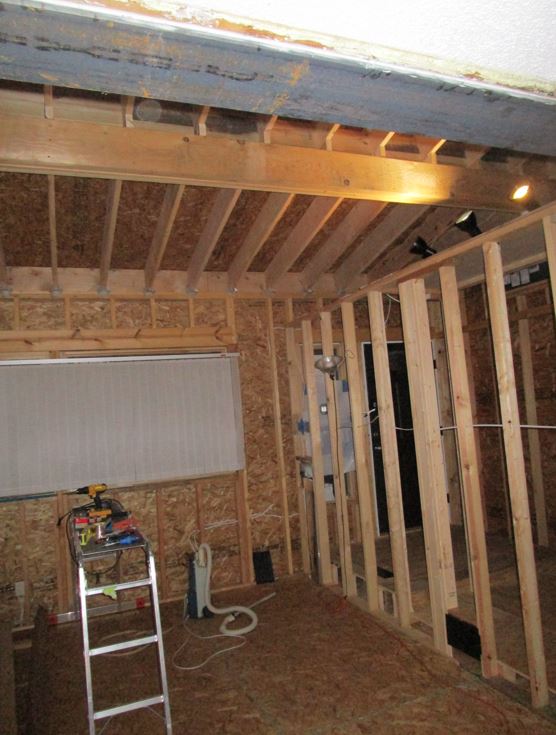
Indoor framing (and wiring) for the living room and entry way walls.
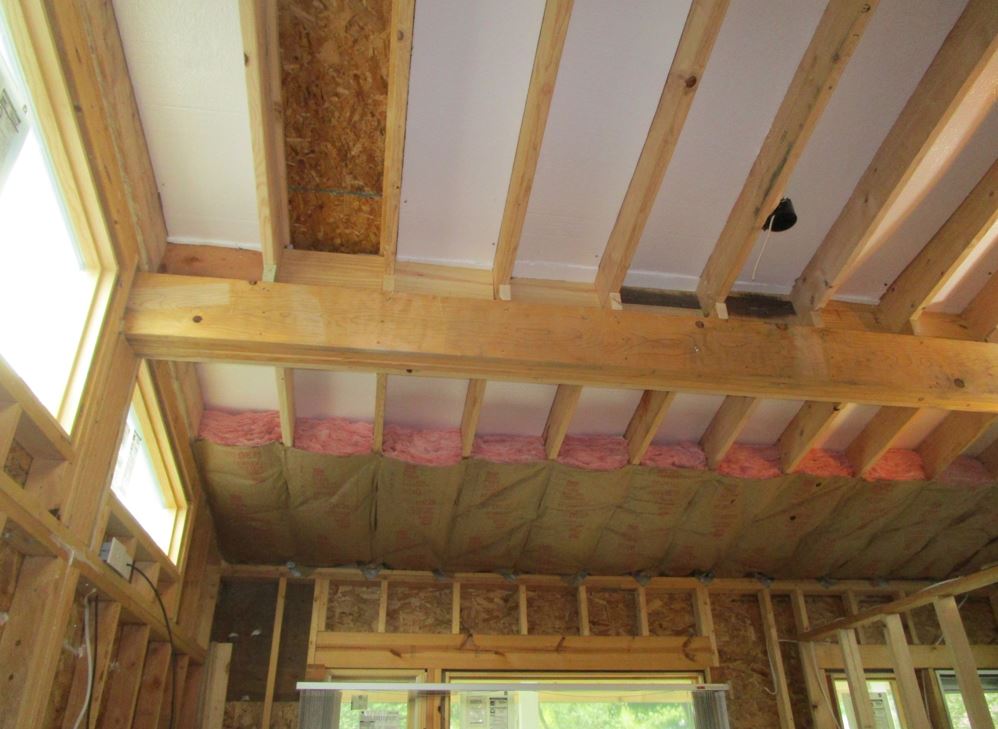
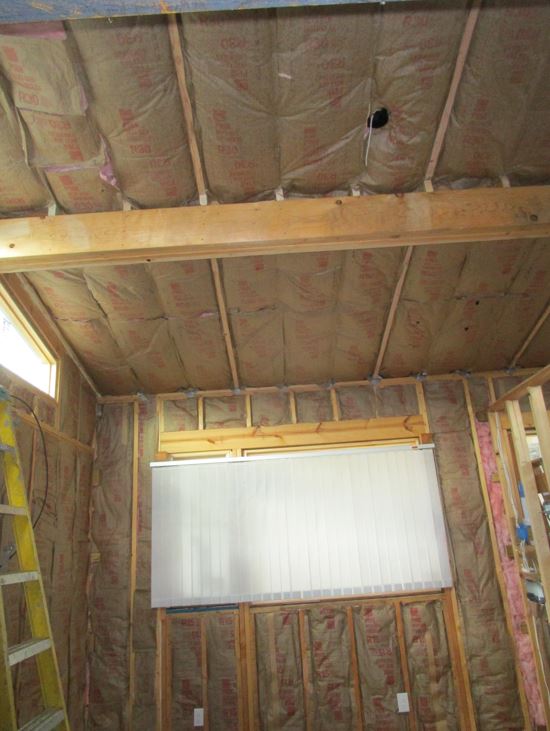
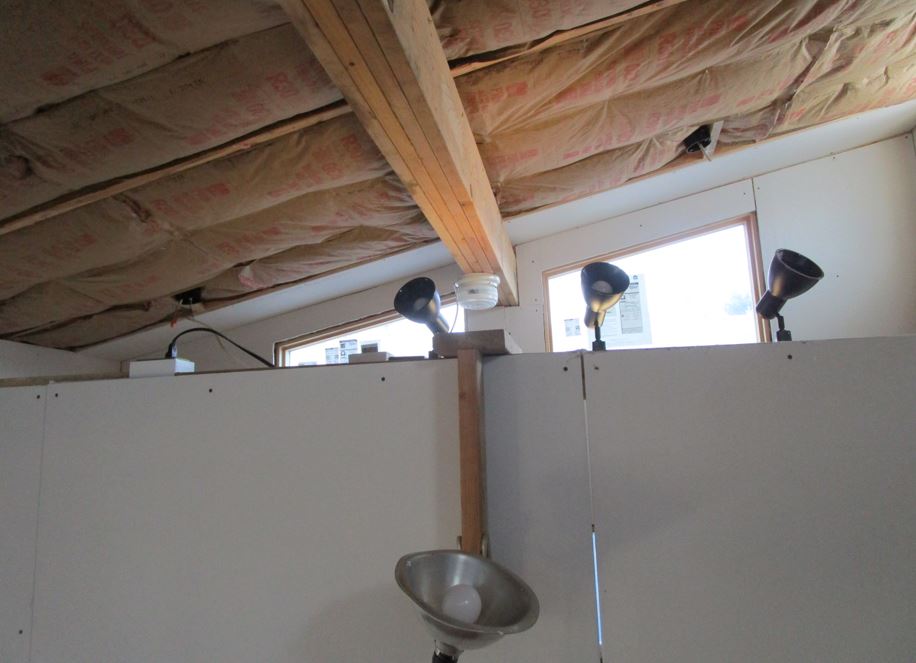
Insulation going in. (Leaving an air gap under the ceiling (for roof cooling) was tricky, but it worked out.)
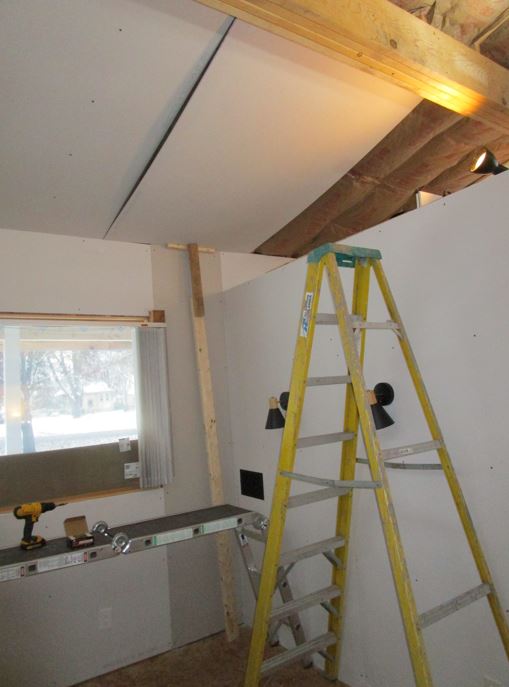
Drywall going up.
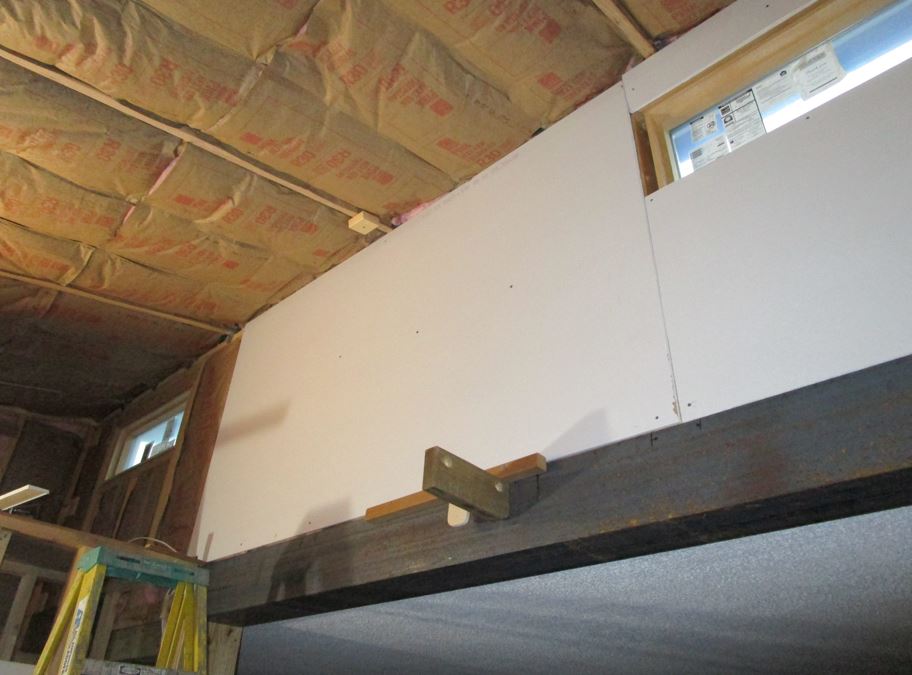
Getting the drywall on the ceiling when working alone was no picnic.
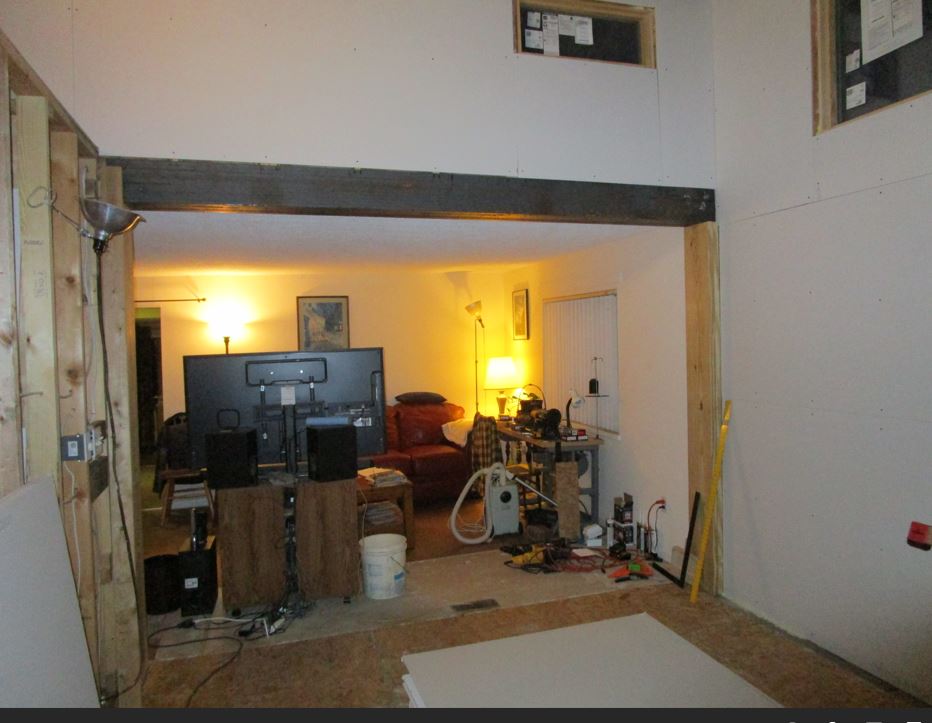
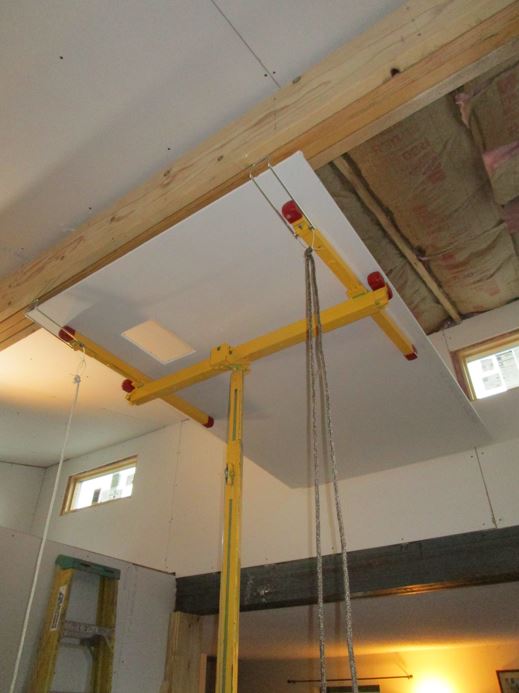
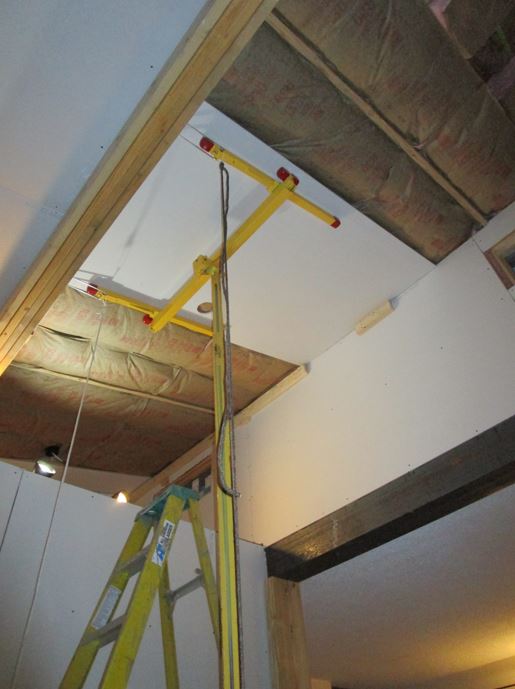
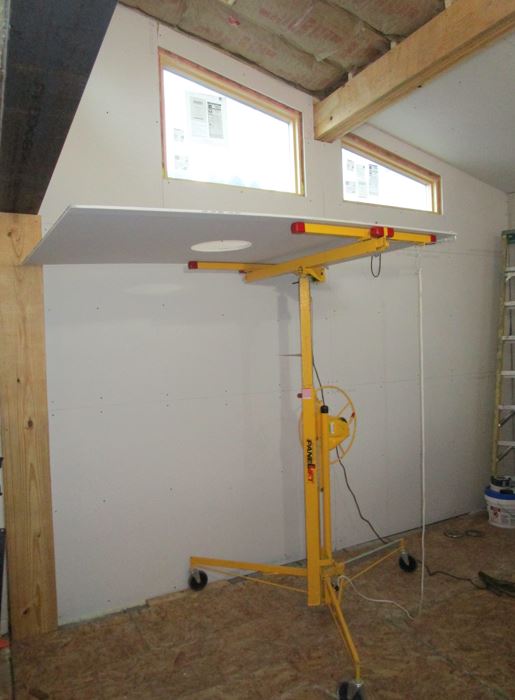
A drywall lift was needed for the highest part of the living room ceiling. Even with that, with the angle and fit required, I had to use ropes to get the sheet to the angle needed to fit between the beam and the wall. I also had to use a wooden track to slide some of the sheets in place.
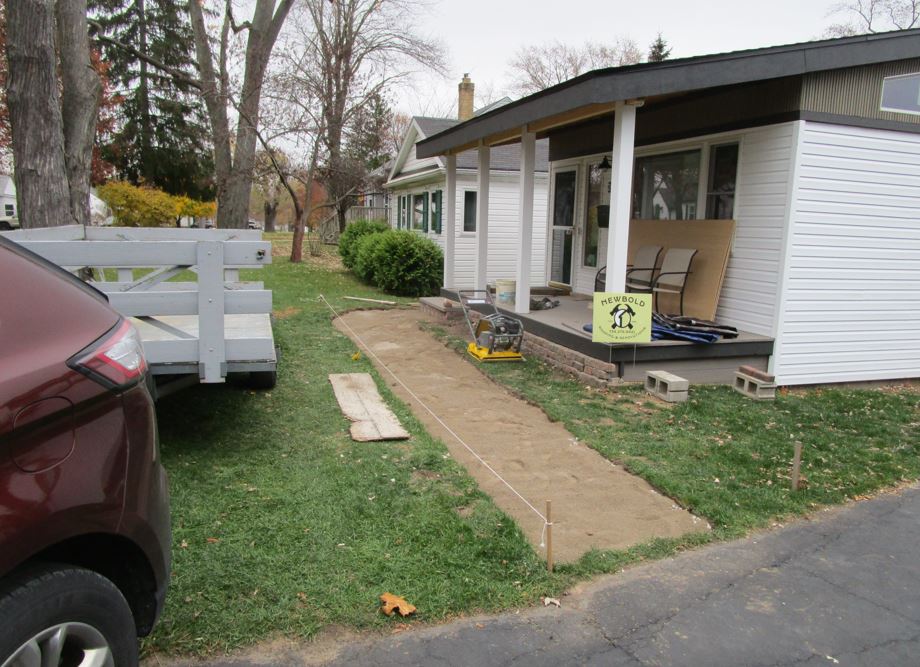
Thankfully there was a week of great weather that I took advantage of to install the front walk.
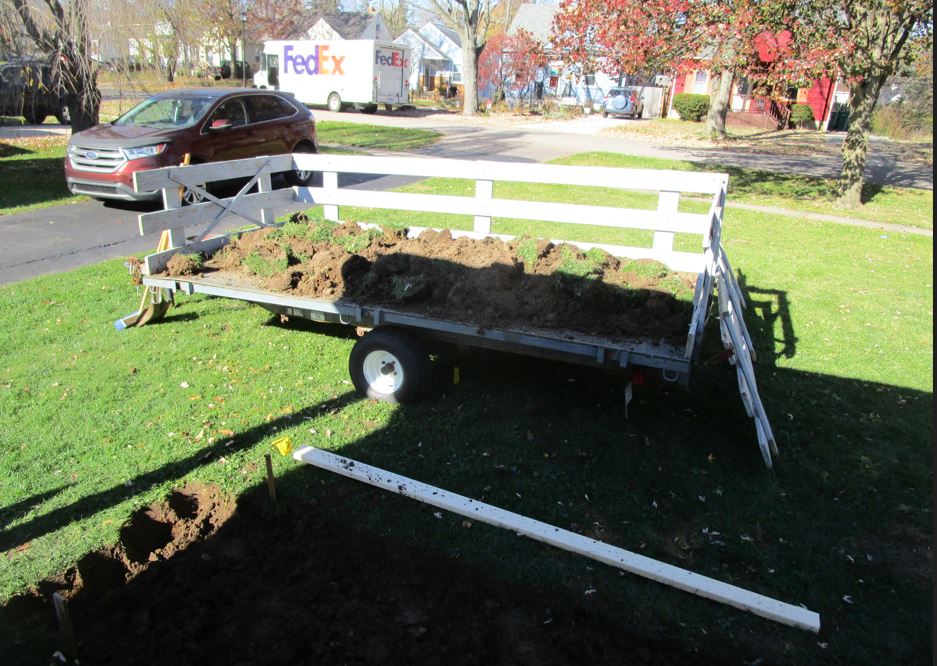
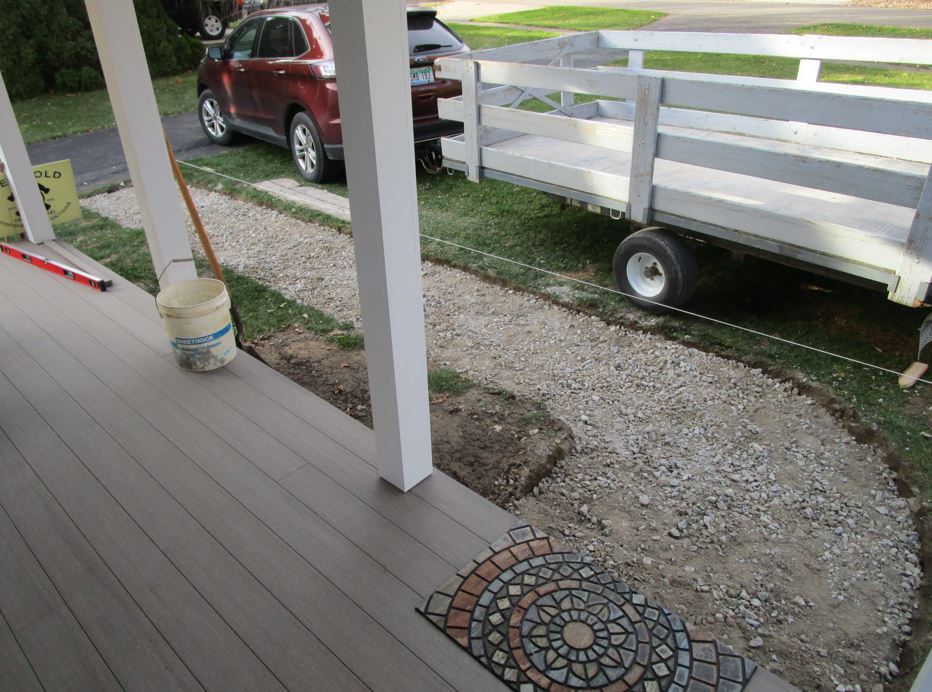
Soil compactor and masonry saw were both rented.

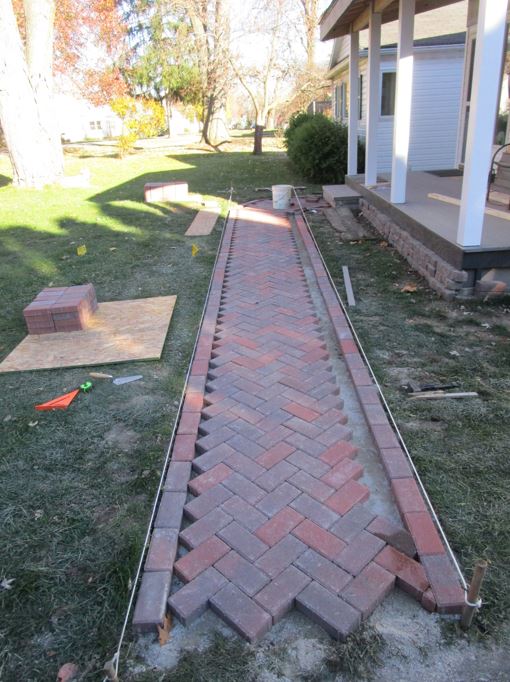
I went with a brick walkway vs concrete. Also used a herringbone pattern, which required a lot of cutting, but I think it was worth it.
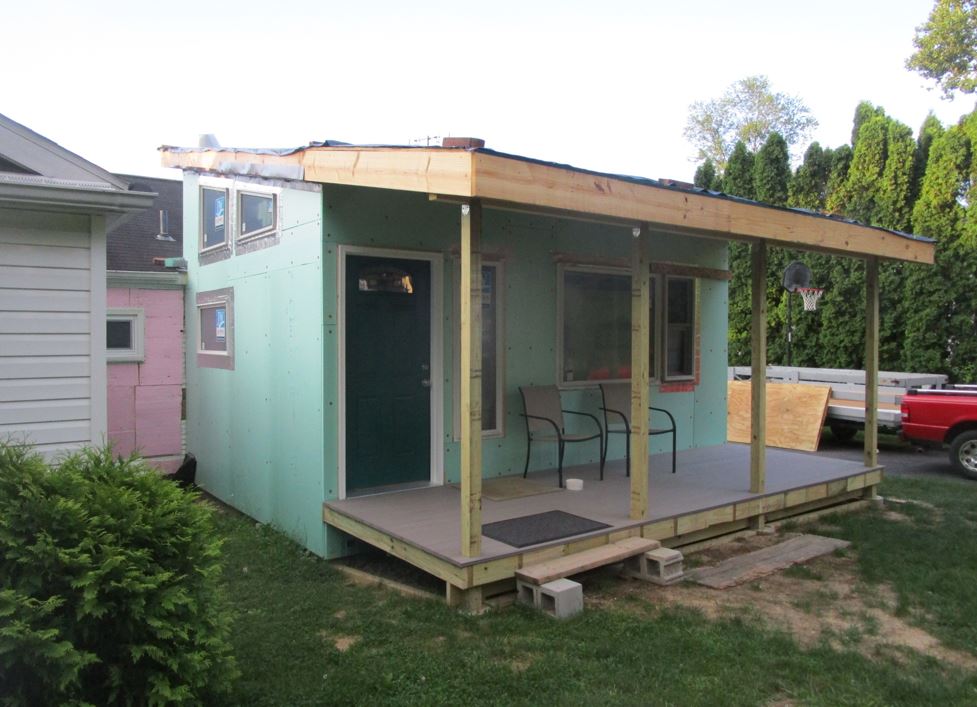
All done! I like it. (So does Sandy.) (The porch ceiling and vent panels are on the porch waiting to be installed. I got that done just before Christmas.)
The Vermont Casting stone (in "mojica brown" porcelain enamel) I bought it in the summer but didn't get it until the house was about done, and specifically the drywall above it.
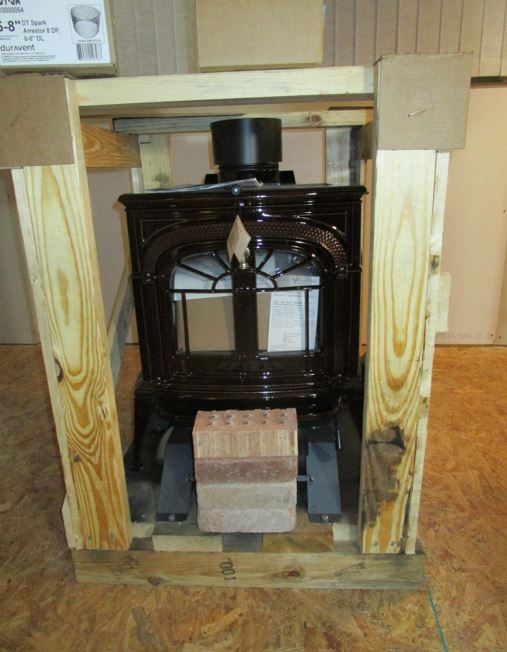
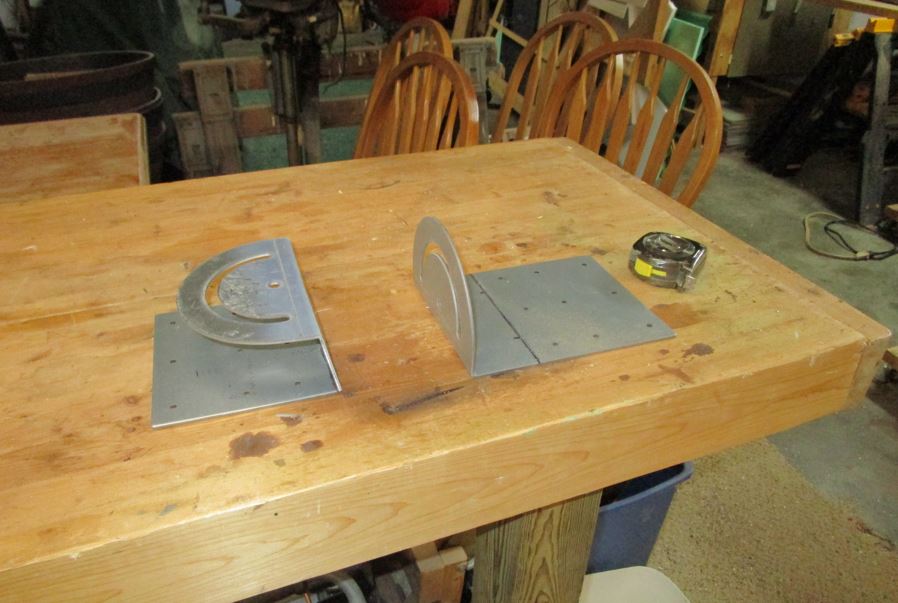
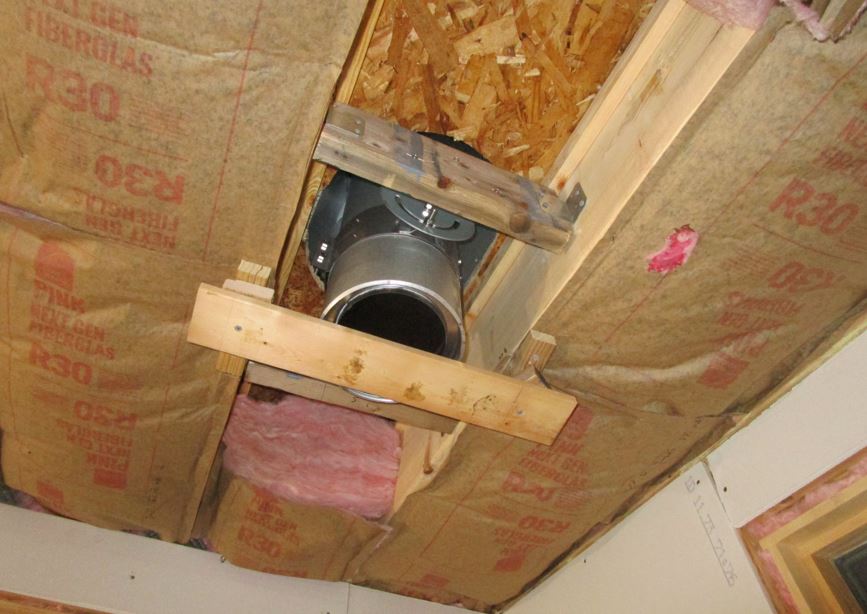
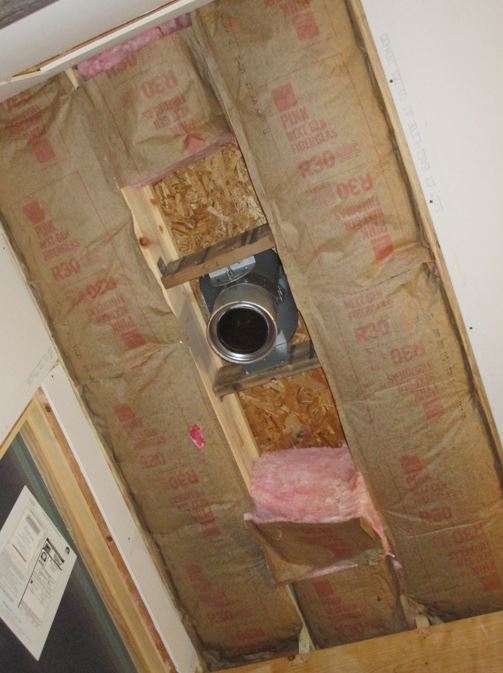
I used a special bracket to hold the chimney pipe which worked out well for the cathedral ceiling (vs a huge square box for a "standard" attic that they tried to sell me.) I had to put a 90 degree bend in it to make it work, which required a hack saw, a vice, a torch, and a great big hammer. It worked.
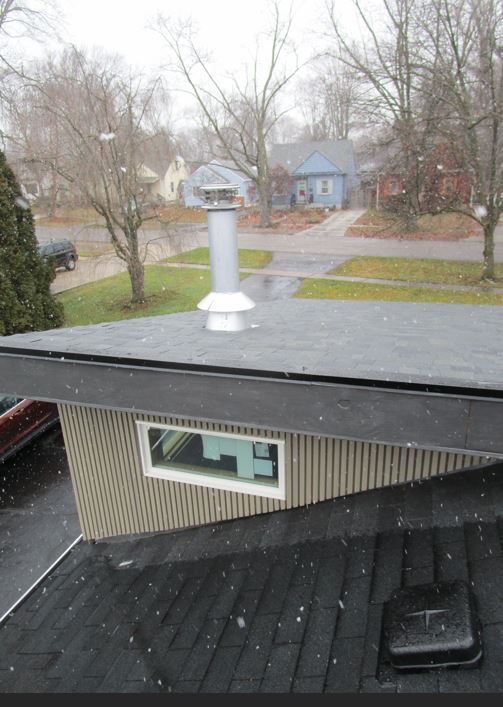
The final piece of drywall going in over the stove pipe after it is fully installed. (I had to rent the lift a 2nd time just for that piece.) Also a shot of the chimney pipe from the outside. (I had the flange for it installed when the roof was installed - it all worked out well.)
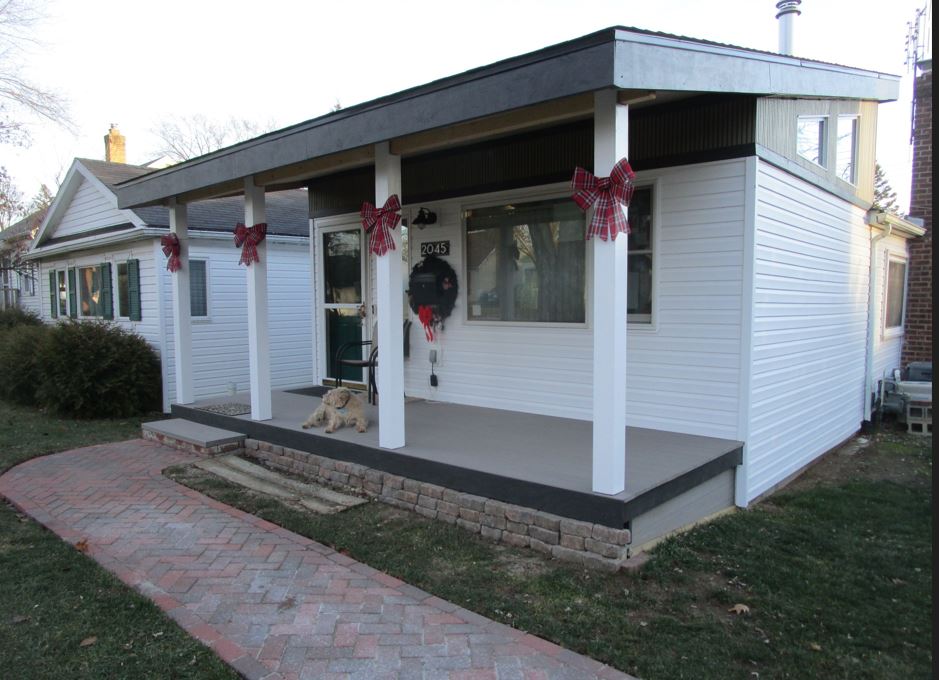
My new addition with the front porch (and doggie) all decorated for Christmas!
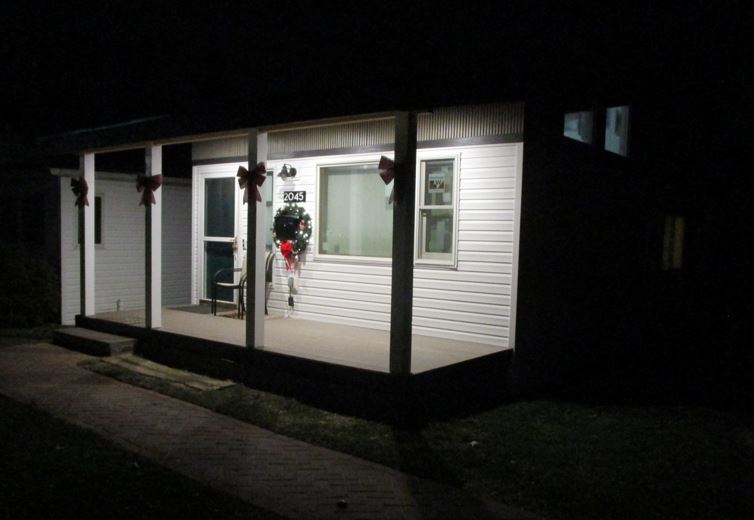
The view at night with the porch lights on. (I really love the look when the recessed lights are on.)
1) an expanded living room space (with a cathedral ceiling), that will allow a dining room where the living room used to be (a mini great-room of sorts),
2) a really nice Vermont Castings wood burning stove (with a brick hearth underneath it and brick wall behind it),
3) a boni fide entry way (with a front door that actually works finally - the old one never did!), and
4) a beautiful, old fashioned, covered front porch.
The two things that I hired out this time was the excavation for the foundation (I did that part last time) and the shingles on the primary roof. (I did all of the singles myself last time, and I did do the small connecting roof myself this time.) But unlike last time, I also had friends help out a few times, and I even hired the son of a friend to help for a few days with the heavy framing work. But most of it by far was done myself, one brick and one board at a time.
The framing for the cathedral ceiling and the large metal (L) beam I had to install where the exterior load bearing wall came down) was really tricky, as was keeping things dry for a few weeks before the roof could go on while the wall came down and beam went in, but tarps and a lot of hard work did the trick.
Taking out the old step and landing. Doing that kinda threw the ball over the fence and let my neighbors know something was going on. (April 27)
All staked out for the excavator. (I hired the same guy I worked with on the bedroom 8 years ago. He did good work for a grand.) (May 24)
Foundation dug, rebar installed, and foundation poured. (As I later discovered, pouring footings is a whole lot easier than a slab.) (May 30)
Finishing up the footings and getting ready for the slab. I had planned to put in a crawl, but I discovered that the foundation on the existing house was only 24" deep, so I was forced to use a slab. That also meant I had to do all of the plumbing and ductwork, and lay down some wire runs up front before I started on the frame. Helper Don (and Heidi!))
These are the boxes that run thru the existing foundation and up thru the (pending) slab. I had to install the boxes before the slab was poured.
Compacted the gravel, added styrofoam and rebar, and all ready to pour.
When the truck shows up with the load, you gotta be ready! (Gotta like the bag-foot look.) (June 9)
What a bugger this job turned out to be. I'd never done a slab, and I learned the hard way. They gave me a dry load, and getting to level (as it was solidifying quickly) was rough. We did the best we could, and got it reasonably level, but far short of what a pro would do. Basically I got my ass kicked. It was a very humbling experience.)
(Dave and Dan as helpers. The 18' long screed board was really hard to pull thru the dry concrete.)
Sill plate and rim joist installed. Had to use tarps to cover things for some big rains we got. The rain this day was a humdinger, lots of rain and hail. The tarp worked so so, and it was a lot of work getting the water pools off of it.) (Sandy helped where ever she could!)
I spent an entire day shimming both ends over every single floor joist on top of the lousy slab we laid down, but that did the trick to get a level floor.
Also a little plumbing installed for a hose bib. (Getting the braze joints under the joists was tricky.)
Putting in the long supply duct run, and the short return one.
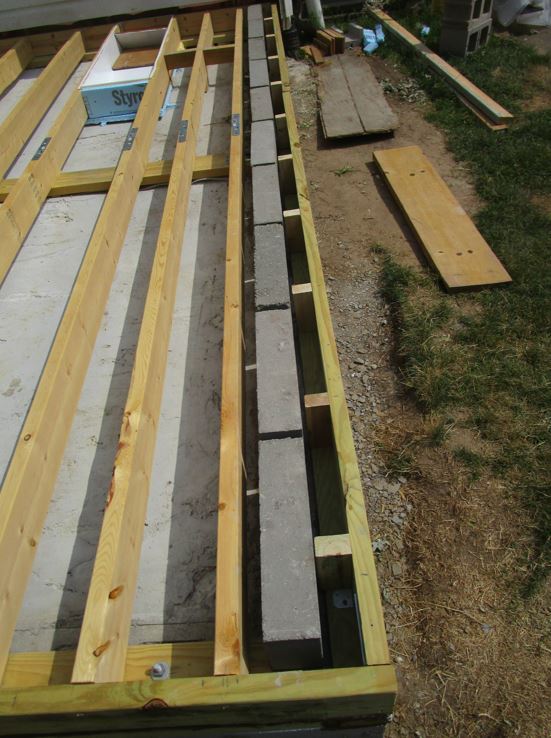
This job was a bitch - I had to shift the main (sanitary) drain line down by a foot, and then bust a hole thru the existing foundation for the supply duct run, then figure out how to support one of the floor joists that lost it's footing. (There is a similar hole for the return run. My arm was sore for a month after all of the pounding with a 5 lb maul.)
And actually the cinder block wall is NOT the foundation - that is 2' further out. This is the wall for the Michigan basement that was installed at some point after the house was built.)
I even blew in insulation in between the floor joists. I spent so darn much time working on the slab and floor that some people thought I was building a large deck. But I did finally start building upward - the first wall is about to go up here. (I actually felt a bit sheepish when I finally started doing that. (Looky here neighbors, it's not just a floor I'm putting in!))
Getting the first stud wall up by myself was tricky. I used a rotating board ratchet system that ended up working well. (One neighbor saw me doing this and sorta watched with a concerned look on her face. Ya gotta get pretty creative to build things like this by yourself.) (July 5)
Getting the two top pieces of framing up was also tricky, and I wasn't sure I could do it by myself, but by golly I did. (It was a lot easier to build the two side walls in 2 pieces.)
Wall framing about done, and much of the sheeting installed. (Putting up 4x8 sheets of particle board was no picnic, but I managed.)
Celling joists installed, and lots of tarps applied. Getting the joists in was a trick, since the wall that would eventually hold them wasn't installed yet, and couldn't be until the existing wall came down and a new beam went in. (That part of the job - including the (rain) water control - was a bitch.) A temporary beam was installed to hold up the joists until the wall went in. That part worked really well.
Working with all of the tarps and a very wet month of July was a bugger. Notice the roof tarp - it worked well, but I very stupidly left it without dropping it down the wall a few inches. Not doing that allowed the next rain storm to dump every drop of water that the tarp caught to flow down the inside of the wall an into the lower tarp. I just needed to adjust it by a couple of inches. (That was a really stupid move on my part, and I learned the hard way!)
Tearing down the existing (load bearing) wall. Normally this wouldn't be done until the roof and walls were all buttoned up, but as I explained, since the roof needed the beam and new upper wall section, I had to tear the wall out before I could put in the roof, which made water management next to impossible.
Supporting the ceiling with the wall down, and getting ready to install the new beam. I used a heavy steel L beam (vs an I beam). I calculated all of the loads and spec'd it out and it worked out perfectly, but installing it was really tricky. (July 18)
The big beam is installed, and no one got hurt! I did it with a lot of wood bracing, and a floor jack with the beam more or less balanced in the middle. (It was crude but effective!) And Sandy offering to help with the small beam. (I had the beam split into two to make the install a bit easier.)
The beam(2) all installed. Notice all of the open sky above in in the picture on the left. Putting in a wall there was the next job, but that took some time. That is when the tarps were the most vulnerable before that wall and the connecting V roof was also installed - and it rained a lot that week wouldn't you know.
Getting the all important "connecting roof" framed and installed. I hired a young guy for some of the trickier framing work. He was the son of some good friends and worked out really well. (Finding any decent help for a project like this wasn't easy. Contractors vs (do-it-yourself) homeowners don't usually mix too well!) (August 1)
I added some roof vents and did the small amount of shingles myself.
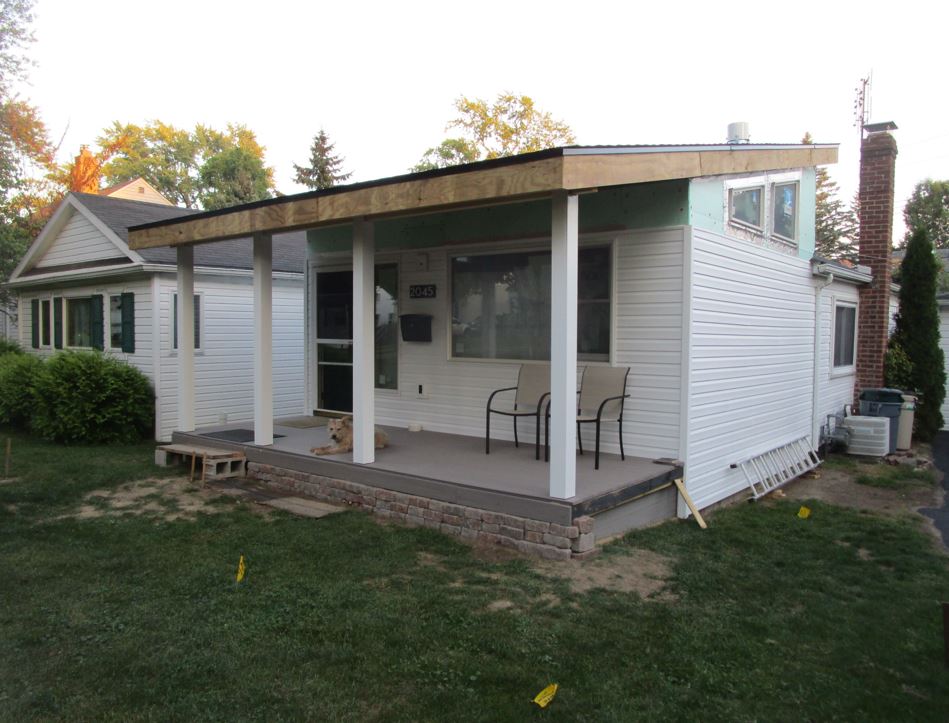
The monolith! (I'm pretty sure most of my neighbors were shaking their heads thinking I was nuts at this stage of the project, and I can't blame them.)
Putting in the post holes for the porch. I was planning to hire that out, but the guy never called back, so I rented the ditch witch and did it myself. Operating that thing was not bad, and kinda fun. Filling the forms with hand mixed concrete on the other hand, was some work.
Porch framing. Tricky, but not too bad, and again I had my helper Tom.
Notice the spacing of the posts. I had intended to place the two on either side of the steps closer together but I put them too close as I discovered.
I spent an entire day "moving" one post about 18". You don't move a 42" deep concrete post, you bury it and put in another one next to it. (This one I dug by hand.)
But after I fixed that, I realized that the 3 posts on the right weren't evenly spaced as I wanted. I was going to let it go, but it eventually bugged me and I shifted the position of the one 2nd from the right. (I did that without digging a new post hole. Not ideal, but it should be fine.)
The central (wooden) beam going in. I didn't actually need this to support the roof, but given I had the cathedral ceiling, I decided I wanted a center beam for aesthetics. I managed to install it myself. Having the open pocket on the left was the key to being able to make it fit. (I noodled a few things out pretty well.)
Adding exterior styrofoam (1" thick) and cutting and installing the windows. (It's finally starting to look like a house vs a stockade!)
Porch flooring going in. I used tongue and groove there vs decking that would need to be gapped. (The porch was a big part of the addition (emotionally), and I wanted it to look nice so I choose the flooring carefully.)
I had planned to do the main roof myself, but thank goodness (said my back and knees!) that I backed off and found a good local contractor. (Newbold - I recommend them.) (Sept. 12)
Siding, front door, light, new address numbers, and mail box. Those worked out well, but I must admit, my design didn't include a plan to fit them in.
(I got lucky that I had a good space for them.)
Working on the front step. After all of the work I did moving the one post, I had room for a nice wide one.
You can also see the different trim boards above the step. On the left I used porch floor boards, and on the right it was wood that matched the trim up above by the roof. Selecting the color for the trim was a lot of work. (For me anyhow.) White is common for trim, but I thought something darker would look better, and after trying about 6 different shades, I finally went with "iron ore" - a dark gray. I like it, but there is a mismatch with the previous addition that I may work on in the spring. (Picking colors is not my strong suite it seems!)
Upper siding installed. (After lots of work.) Deciding what to do for the exterior look was a big decision. I finally decided to split the walls as I did and used European style vertical siding on the upper part. After a lot of fussing, I think it worked out great. (I opened myself up for input (and abuse!) from friends while making the decision on how to do the siding. Unfortunately my design didn't have those details worked out a head of time, and after the "monolith stage" I realized I needed to do something to spruce up the look.)
Adding the platforms in the entry way. Deciding to raise the porch up (and the front door as well) was a big decision I made based on the slope of the ground running downhill from the street to my house. The design ended up working out well, but my use of a table saw didn't for my poor thumb. (I was really ticked at myself for getting a buggered up thumb. It happened due to a board getting "kicked back" just as I was grabbing it, but it should have never happened. It was ugly, but thankfully it finally healed up nicely.
Indoor framing (and wiring) for the living room and entry way walls.
Insulation going in. (Leaving an air gap under the ceiling (for roof cooling) was tricky, but it worked out.)
Drywall going up.
Getting the drywall on the ceiling when working alone was no picnic.
A drywall lift was needed for the highest part of the living room ceiling. Even with that, with the angle and fit required, I had to use ropes to get the sheet to the angle needed to fit between the beam and the wall. I also had to use a wooden track to slide some of the sheets in place.
Thankfully there was a week of great weather that I took advantage of to install the front walk.
Soil compactor and masonry saw were both rented.
I went with a brick walkway vs concrete. Also used a herringbone pattern, which required a lot of cutting, but I think it was worth it.
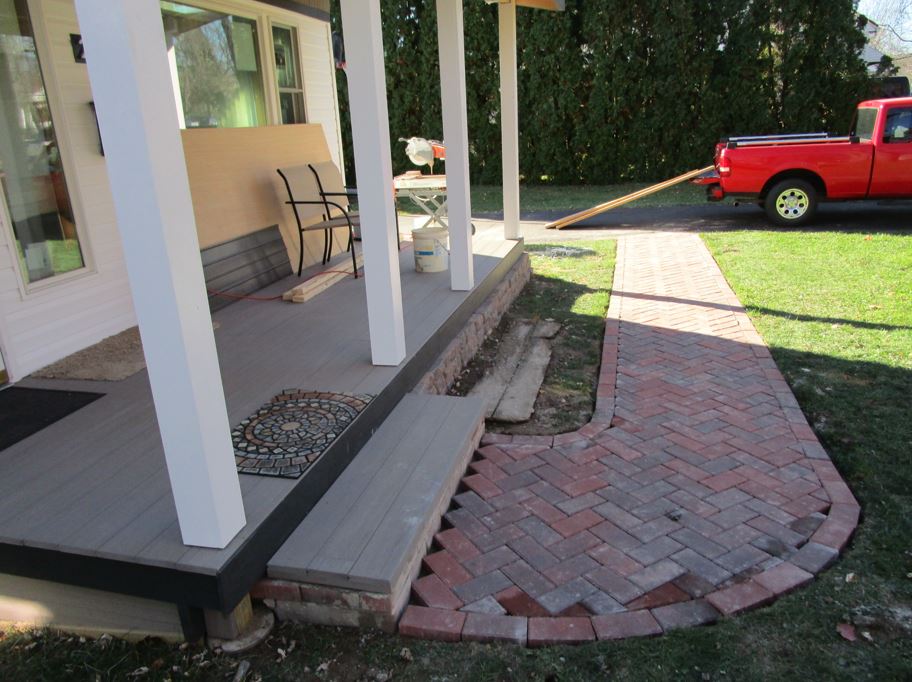
All done! I like it. (So does Sandy.) (The porch ceiling and vent panels are on the porch waiting to be installed. I got that done just before Christmas.)
The Vermont Casting stone (in "mojica brown" porcelain enamel) I bought it in the summer but didn't get it until the house was about done, and specifically the drywall above it.
I used a special bracket to hold the chimney pipe which worked out well for the cathedral ceiling (vs a huge square box for a "standard" attic that they tried to sell me.) I had to put a 90 degree bend in it to make it work, which required a hack saw, a vice, a torch, and a great big hammer. It worked.
The final piece of drywall going in over the stove pipe after it is fully installed. (I had to rent the lift a 2nd time just for that piece.) Also a shot of the chimney pipe from the outside. (I had the flange for it installed when the roof was installed - it all worked out well.)
My new addition with the front porch (and doggie) all decorated for Christmas!
The view at night with the porch lights on. (I really love the look when the recessed lights are on.)